This work actually was completed a couple weeks ago but I realized I had not updated the blog to show the progress. So, in the interest of maintaining a complete construction record, here goes…
The track that hugs the outer edge of the benchwork and circles around the engine service area is meant to be representative of the real Spur 4 on the AC&Y. Spur 4 came directly off of the yard and went to General Tire and Goodyear Plants 1 & 2 as well as to the interchange with the Akron Barberton Belt Line.
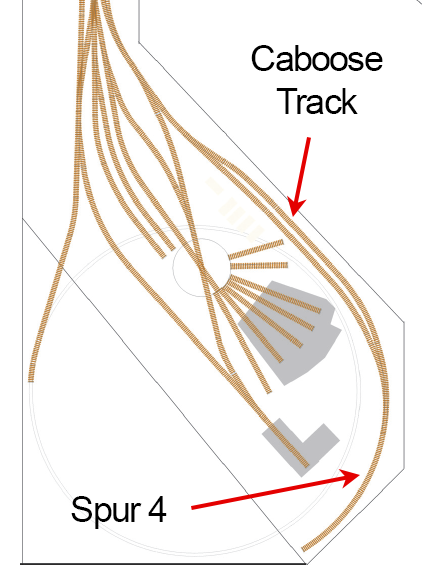
On my railroad the spur does not service the rubber plants or interchange with the ABB as on the prototype but rather simply ends near the backdrop. The modeling purpose for Spur 4 on my railroad is to act as a yard lead – a place to pull cuts of cars while switching Brittain yard. The real AC&Y used the main track for their switching lead. I can’t do that because it would require pulling cars behind the backdrop and that wouldn’t work well at all. Besides, I want the main to stay clear. Because my railroad is so small there will be a lot more traffic on the main than ever occurred on the real AC&Y.
Spur 4 also served another purpose on the AC&Y. Along the spur within the yard limits was the caboose track, a place to store cabooses. This function is preserved on my railroad. Seems to me it will be real handy to have the cabooses stored alongside the yard lead. The switcher should be able to easily tack on a caboose once the train is assembled. Plus, Brittain engine service area just wouldn’t look convincingly like the prototype if the line of cabooses were missing. The caboose track is the first thing you see when you pull into the main entrance off of E. Market St. Or at least it was in 1969. Cabooses are long gone nowadays.
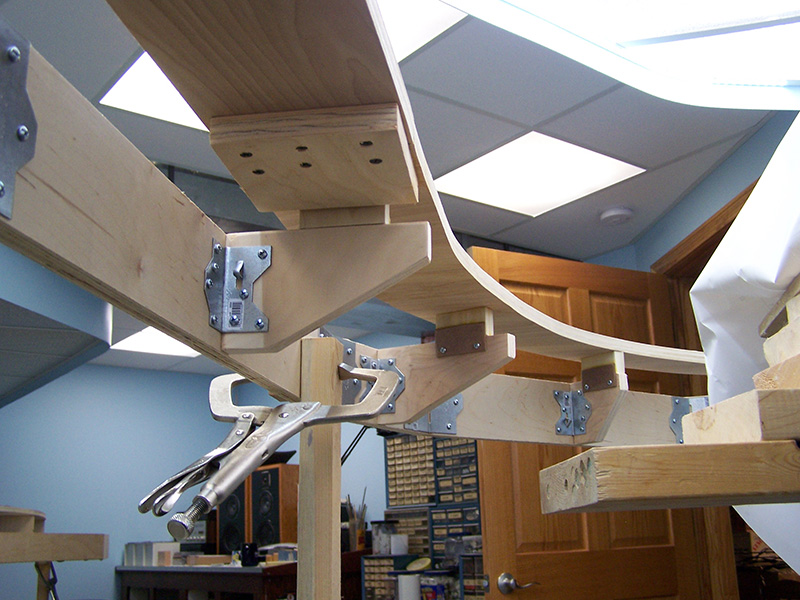
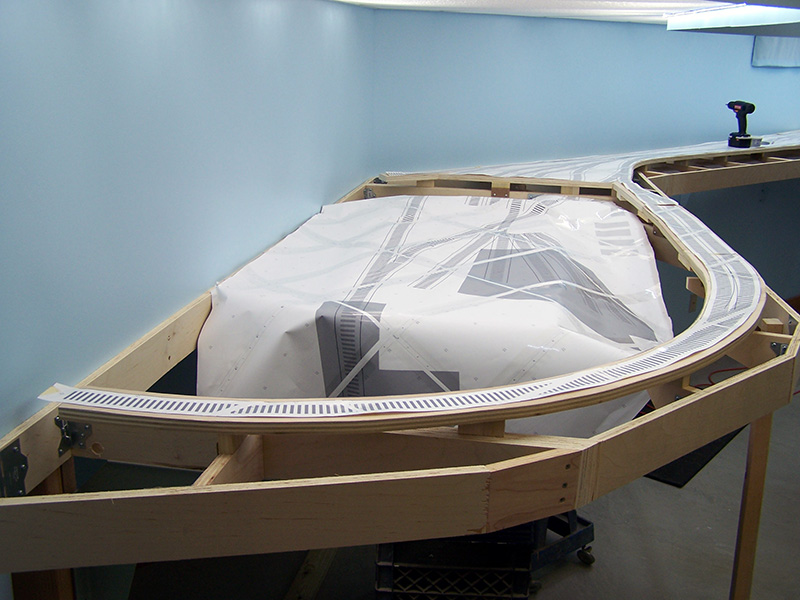
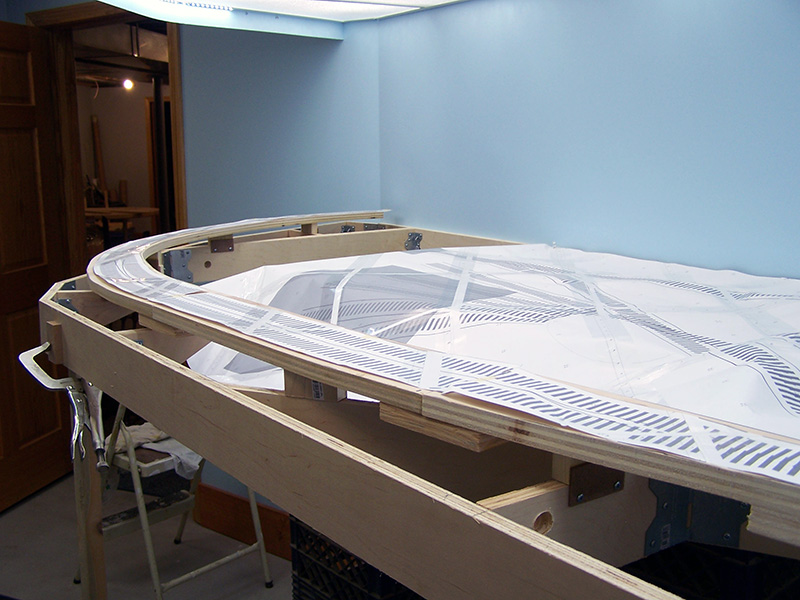
The benchwork in the engine service area is unique on the railroad due to the fact a helix will sit both inside and below the turntable, roundhouse, diesel shed, and all the associated trackwork. 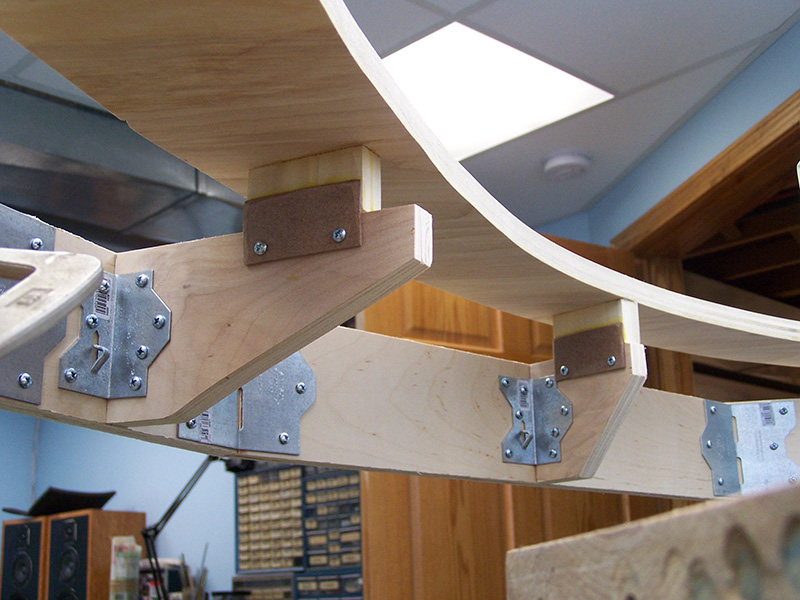 The helix is the faint gray circle in the above drawing. The uppermost lap around the helix will be inside the benchwork. That means no crossmembers can be present. The helix, once installed, will serve as the support for the area above it. Spur 4 is outside of the helix so is not supported by the helix. Instead, Spur 4 is supported by corbels attached to the face board of the benchwork. The bottom edge of the corbels is cut at an angle to provide a little working clearance when it comes time to install the helix. The same framing angle attachment method used throughout the benchwork was also used to attach the corbels to the face board. There is a framing angle on each side of each corbel to prevent any lateral movement. All in all, the assembly is extremely rigid. The short stub at the very end of Spur 4 (extending beyond the last riser) will be trimmed to length once the scenery starts to take shape along the backdrop.
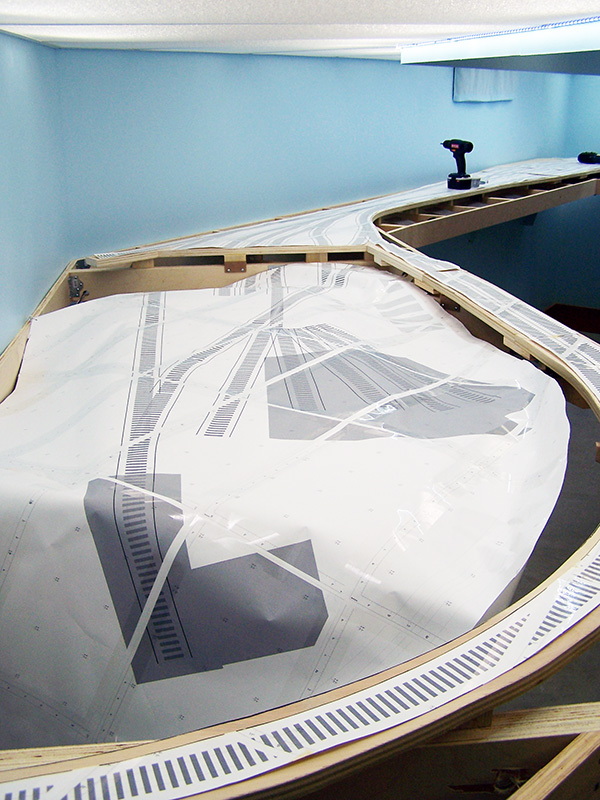
With Spur 4 in place this completes the installation of benchwork attached sub-roadbed on the upper deck. Next up is fitting 2″ foam board for a landform base. Two 4×8 sheets lay in wait. Stay tuned.


Alan as usual your workmanship and attention to detail is an inspiration to anyone who would care to read your blog.
Thanks for sharing
Rob
Hi Alan – Rob (Cornhill & Atherton) here. I see the relevance of your “Wedding Cake/Helix” question in MRH. If I am understanding your approach correctly you have solved the problem on the LK&O by visually splitting the helix in half – brilliant.
Rob, The original Spur 4 on the AC&Y drops slightly in elevation as it departs Brittain Yard. The railroad built a railroad tie wall along Spur 4 that gradually gets taller the further down Spur 4 you go. I am going to use the tie wall LDE to hide the fact there is a 1/2 helix next to and slightly above Spur 4. None of the helix will be visible when complete.
Splitting the helix into half front of the backdrop and half behind was part of the plan early on. In my G&D you will notice “No blobs”. To me, nothing screams toy train louder than big curves of track that end up almost where they started. Something a real railroad would never do. Even if my helix were visible it still would not have violated this Given because of the backdrop split.
Additionally, the backside of the backdrop is power supply central. The one common point where all layout electrical converges. Half a helix is enough to stand inside of so I can service the railroad electrical while standing up. So much better than crouching under the layout or working overhead.