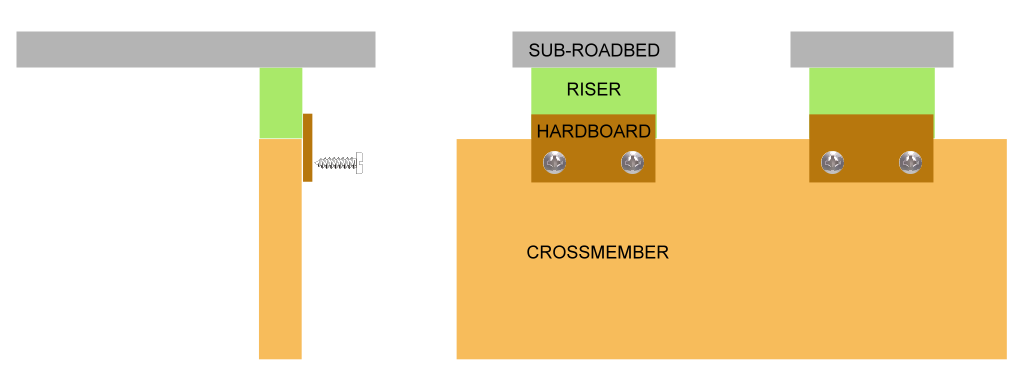
Now that the sub-roadbed is cut and fitted it is time to get it up off the benchwork. This is done with risers. The conventional method is to simply attach a piece of pine board to the side of a crossmember and then fasten the sub-roadbed on top. The riser is cut to an approximate length and then adjusted in height by where on the crossmember it is attached. The Richlawn RR is a good example:

I am doing it a bit differently surprise surprise. My risers will sit on top of the crossmembers. Why, you ask? Several reasons actually. First, because I can. Most benchwork is not constructed to tight enough tolerances that all crossmembers are at the same exact height. Mine are. This is where the labor invested in building straight and true benchwork starts to pay off. The birch plywood allowed me to rip boards that are straight, exactly the same width and free of warp, twist, or bow. Assembling the benchwork sections on the workbench permitted me to get every board square and level. In short, my benchwork is square and flat. Second, all of the Ohio and Michigan area of the railroad (shown below in blue) has the track at the same elevation. It is flatland as far as the railroad is concerned. This means I can mass produce risers of the same height for use in this entire area.
 The third reason is to free up space. With no risers on the sides of the crossmembers I have more space for future things that may need to be there i.e. linkages for animated objects, electronic circuit boards, etc. This is a rather trivial feature but a feature nonetheless. Forth and final, less wood needed. There will be a huge number of risers, 146 I calculated just for flatland. When you add up all the board feet it really makes a difference. 23′ of 1×3 poplar was enough to make all of my risers for flatland. Had I went the traditional route it would have required at least twice as much, maybe more. $26 would have turned into $54+ with no additional benefit.
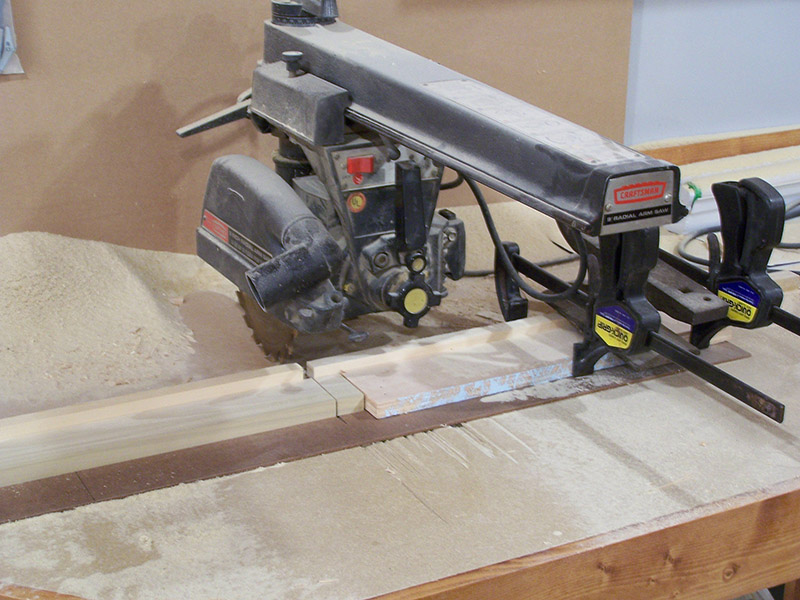
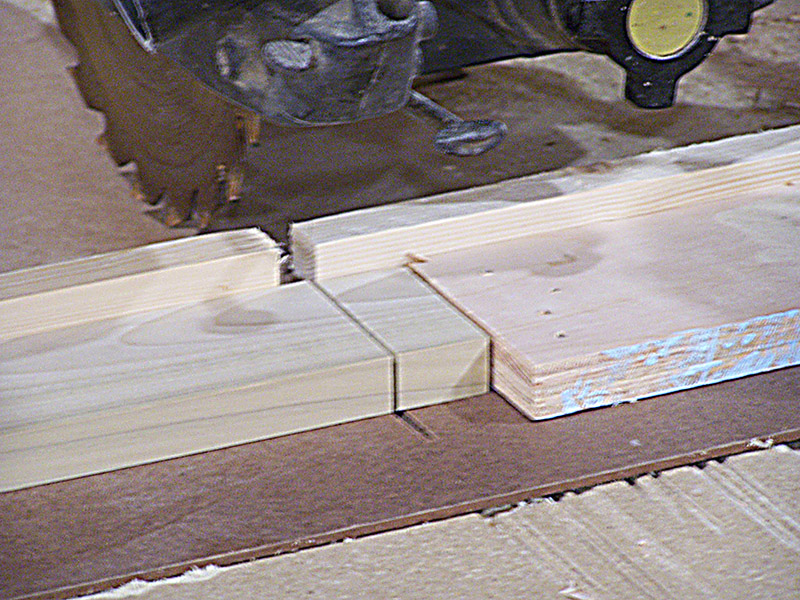
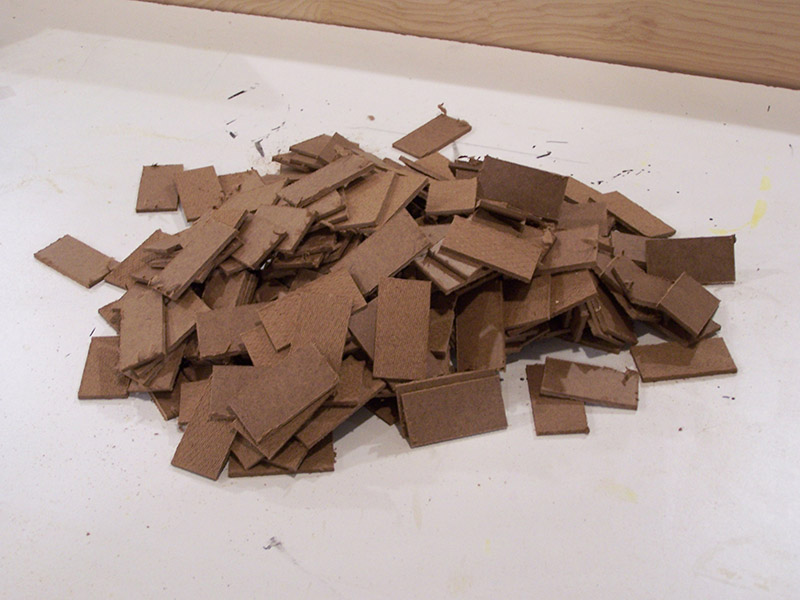
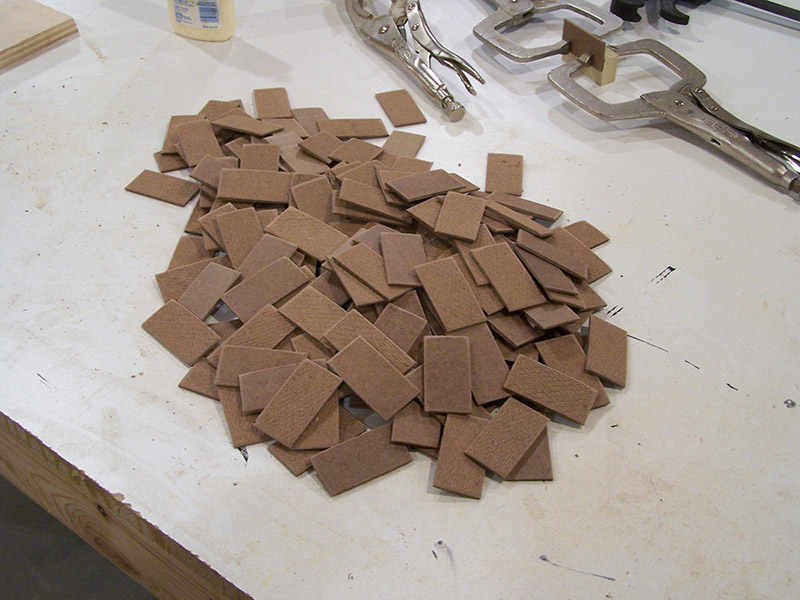
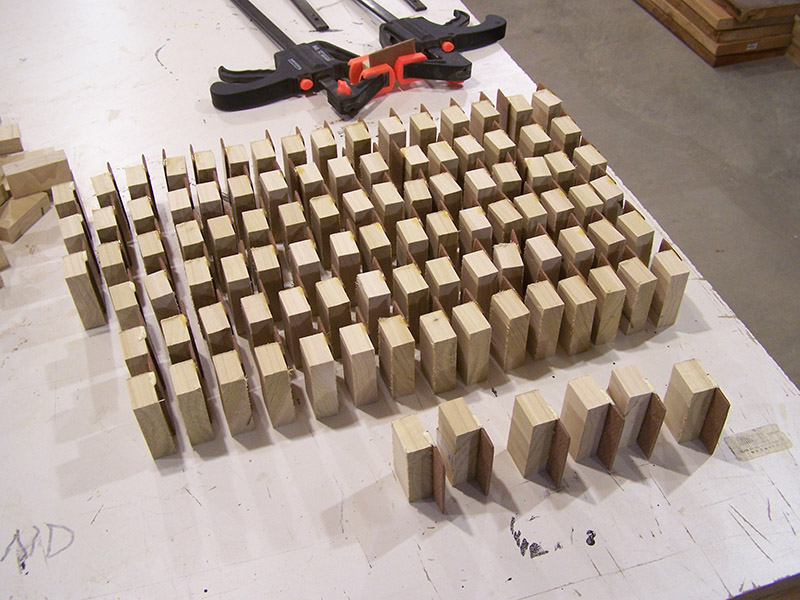
The zero elevation for the railroad is 53″. The benchwork is 2″ below this. With the sub-roadbed having a thickness of 3/4″ my risers needed to be 1-1/4″. A quick jig was clamped in place on the radial arm saw and 20 minutes later I had 150 little 1-1/4″ poplar blocks. Setting a block on a crossmember is easy enough but how to keep it there? Hardboard scraps leftover from the lighting valance to the rescue. I cut strips of Masonite the same width as the poplar and then using the same riser jig on the saw I cut 250 rectangles. I’ll need them for the Maryland portion of the railroad too so I cut a bunch. Masonite doesn’t cut real clean. At least not with the combination blade in my saw. 2 hours at the bench sander cleaning up all the edges was incredibly boring but it is done. The pieces are clean.
The hardboard pieces are glued to the side of the poplar blocks leaving 3/4″ of hardboard extending down. Through the hardboard will be a pair of #6 x 1/2″ screws attaching the riser to the crossmember. Once all the risers are in place I’ll run a bead of glue across the top of each and set the sub-roadbed section in place, weight it, and allow to dry overnight. Lather, rinse, repeat all the way round the layout.
For right now I am still mass producing risers. Check out my assembly line in the picture gallery.
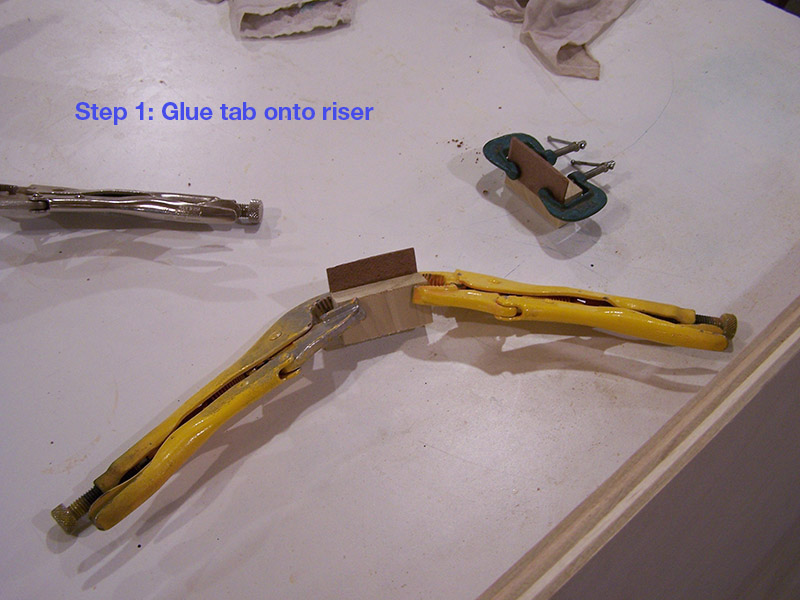
- Glue tab onto riser
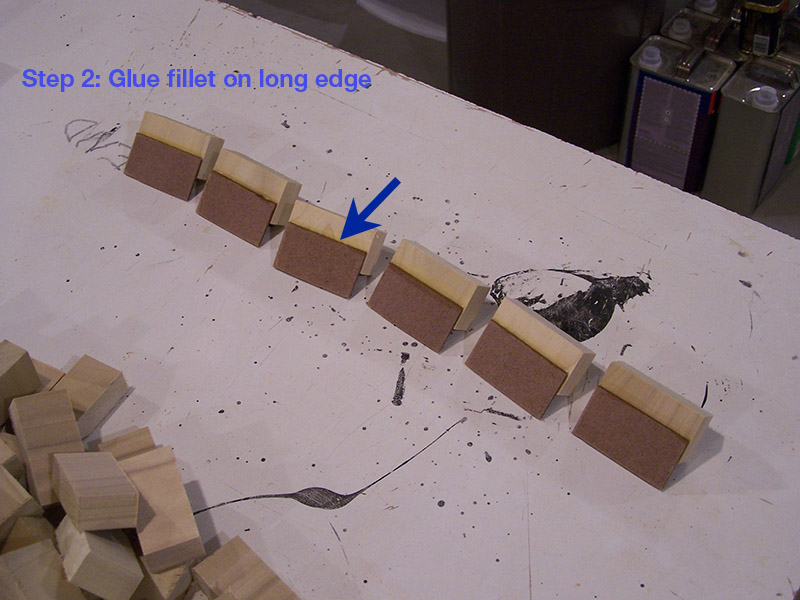
- Glue fillet on long edge
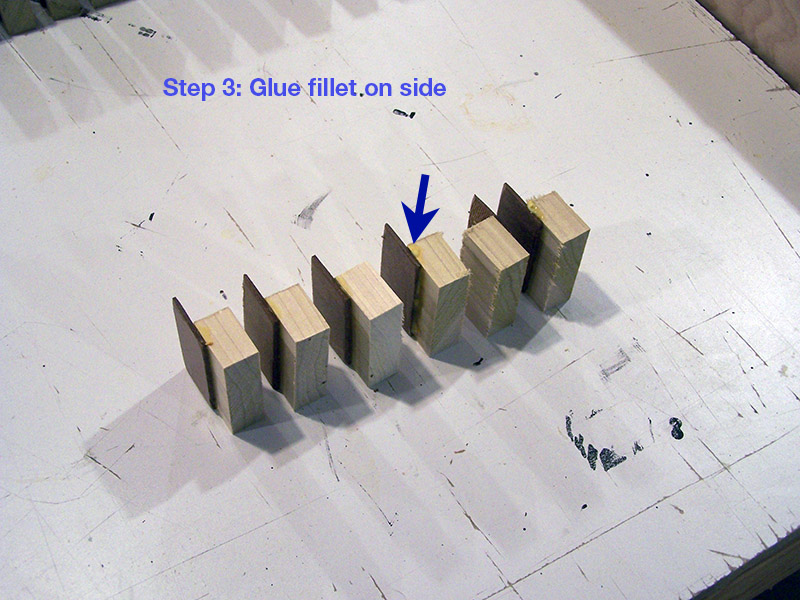
- Glue fillet on side
- Glue fillet on opposite side
- Finished riser
About every 4 hours or so I advance 6 risers one step in the process. A week from now I should have all 150 ready to go!


[UPDATE]
The riser factory has been running all week. Should have sufficient risers to get a fair amount of sub-roadbed mounted this weekend.

Leave a Reply