Well, it doesn’t do any good to lay a bunch of track if there is no power to hook it to. I am in the process of remedying that situation. On hand is 2000′ of 12 gauge wire and a box of barrier terminal strips to install beginning this weekend.
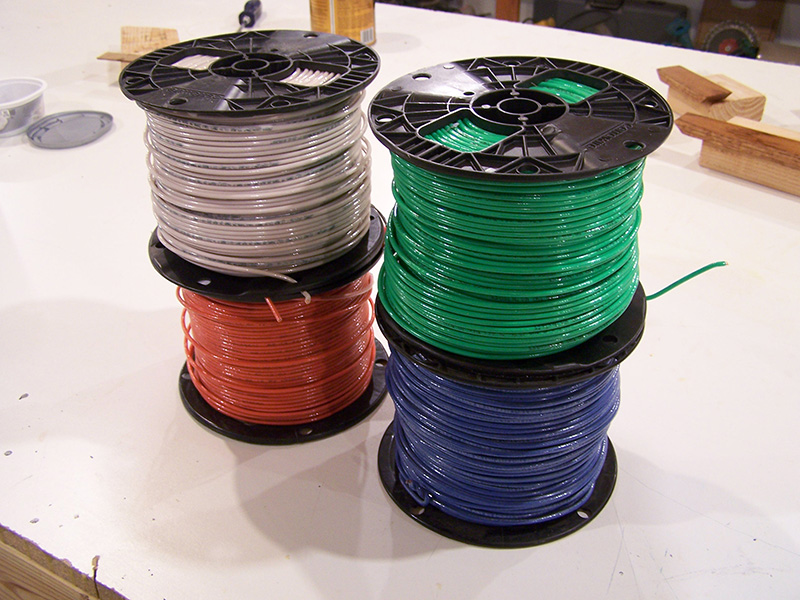
I love eBay! Wire $10 less expensive per roll than Home Depot ($42 vs $52), free shipping, delivered to my door. Can’t beat that deal with a stick. The orange is for the track bus, blue is controls bus, and green for accessory bus. White is return on each. I also have a bunch of 22 gauge wire in the same colors for the interconnecting wiring.
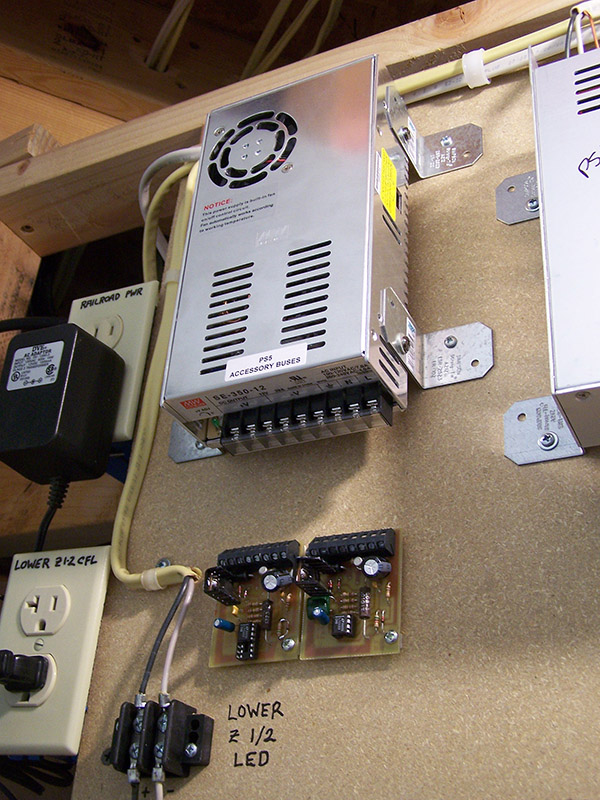
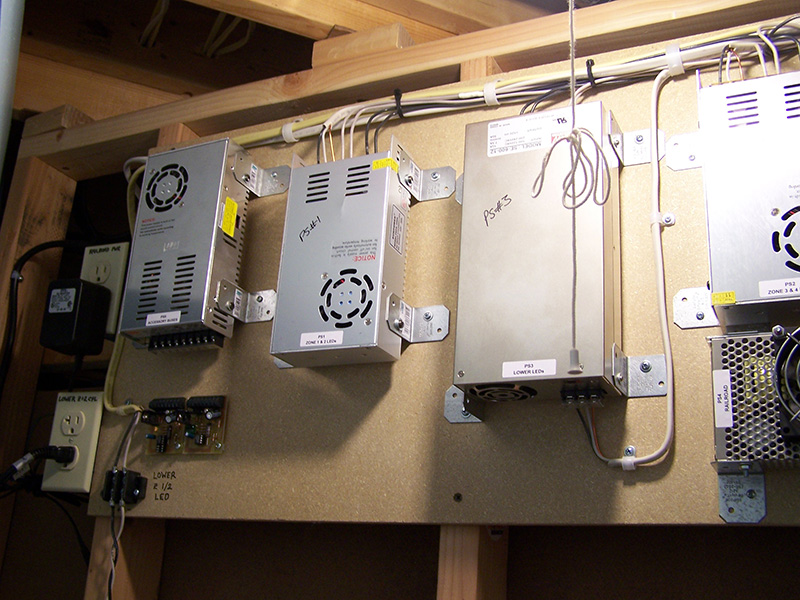
The control and accessory bus share a common 29A 12V power supply which is already mounted and ready to be wired. I pressed into service a couple of my home brew circuit breakers set to 10A trip, one for control bus, one for accessory bus. The breaker on the left was my original prototype unit for my power district breakers. Even though components had been changed out several times during testing and the board looking a bit sloppy (notice the diode soldered across the resistor) I couldn’t let it go to waste. It has a home and a purpose now.
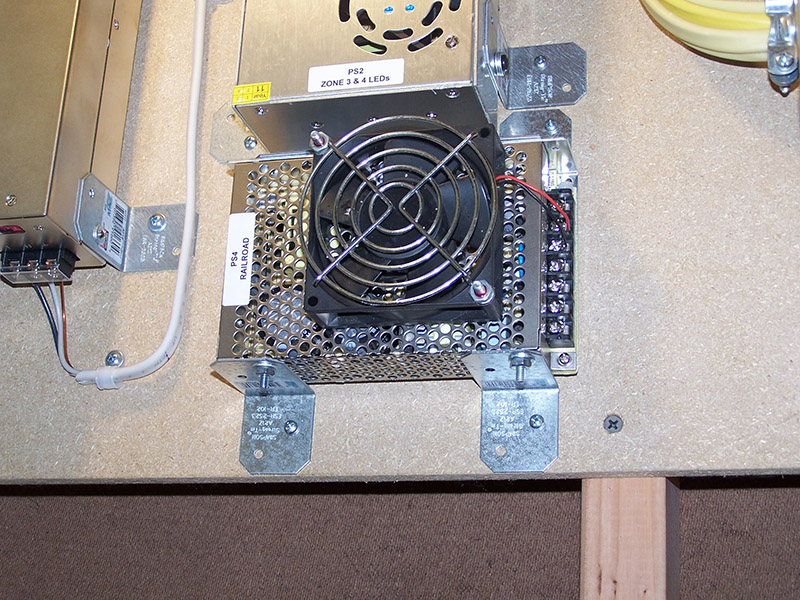
The track bus that powers the trains on the rails has its own 7A 16V power supply also mounted and awaiting wiring. I noticed in the data sheet the output has to be de-rated when mounted vertically unless fan cooled. This is my only power supply that did not have a built in fan so I added one from my fan junk box. It’s actually a 24V fan but it runs real nice on 16V.
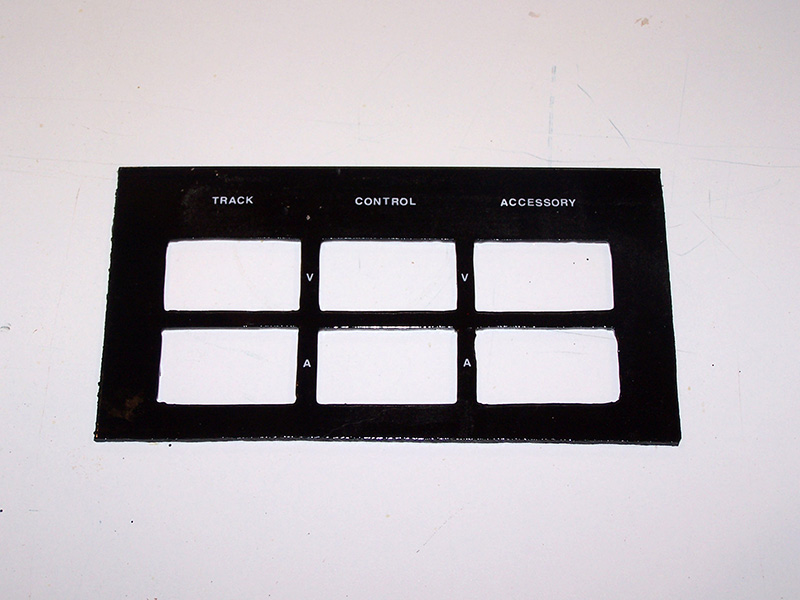
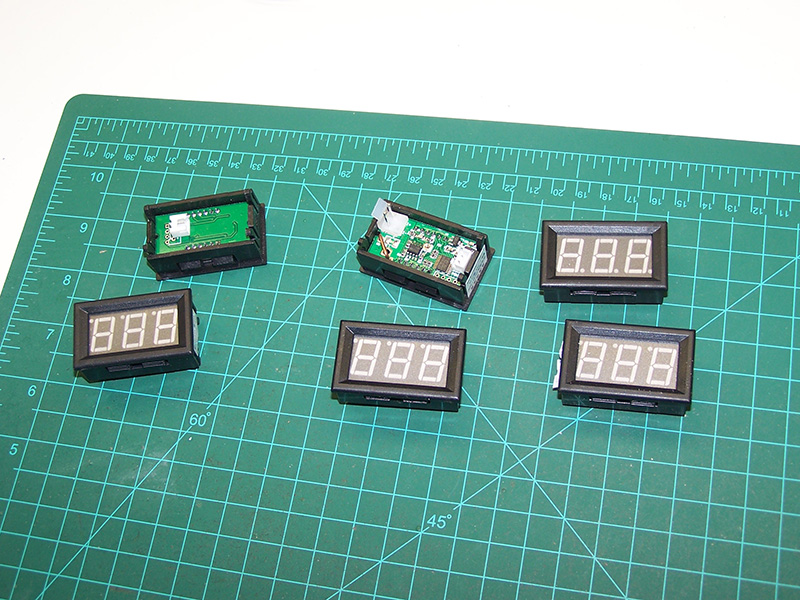
Lastly, I am in early steps of making a fascia panel that will allow me to keep tabs on the bus’ status. Found some really nifty volt and amp panel meters on a Chinese e-commerce site called BuyInCoins.com. It took them a month to arrive but you sure can’t beat the price – $1.99 each. The early panel parts look rough but that will disappear when completed. The faceplate is 1/8″ Lexan painted black on the backside with rub-on lettering on the front buried under 6 coats of clear lacquer. I’ll flat sand and re-coat with a nice smooth layer of clear. She’ll be perrrty!
This is the last of the planned power systems components. Sort of has to be, I’ve just about run out of mounting space!

Leave a Reply