And we’re back! There went an entire summer with practically no work completed on the railroad. Such is how summer goes. So much to do outside leaves precious little time for hanging out in the basement playing trains. On the plus side, I did get a lot accomplished around the homestead this summer. Poured a new concrete floor in the barn, laid some asphalt, repaired countless broken odds-n-ends, mowed acres of grass, and basically enjoyed the sunshine. The mowers have been put back into storage, the leaves have turned, and the temps are dropping fast. Time to get back to trains!
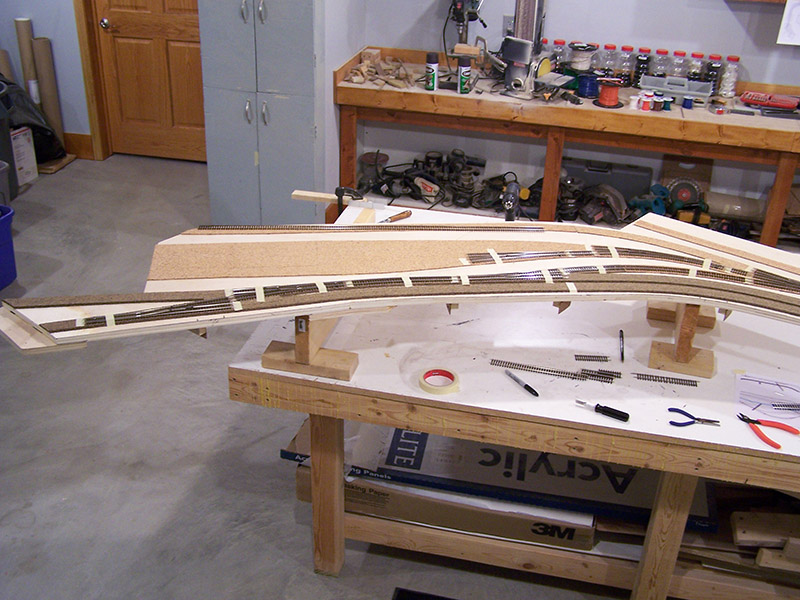
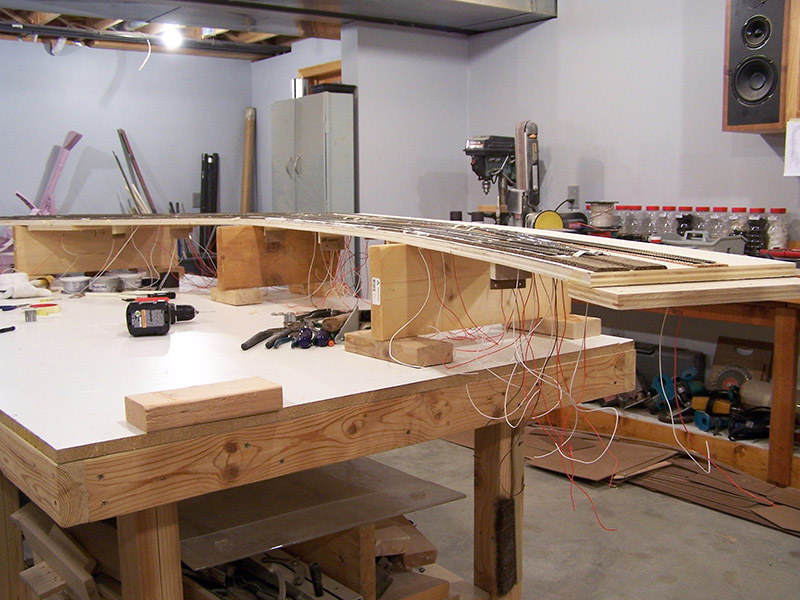
It has been so long since my last post I thought I should not delay any longer. So, here is a partial completion of module 5 post. Another will follow when the module is totally finished. I mentioned in the last post module 5 is a bit different than previous modules. Here’s why:
Detection, detection, detection
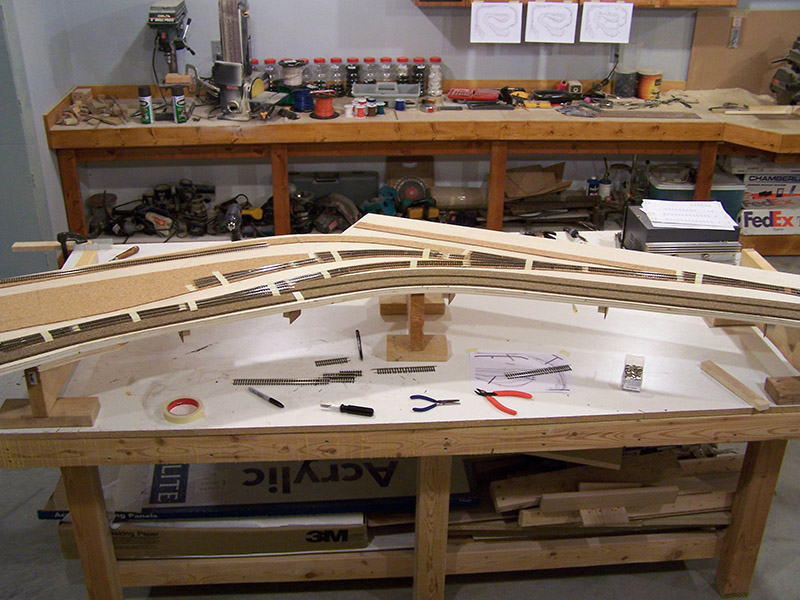
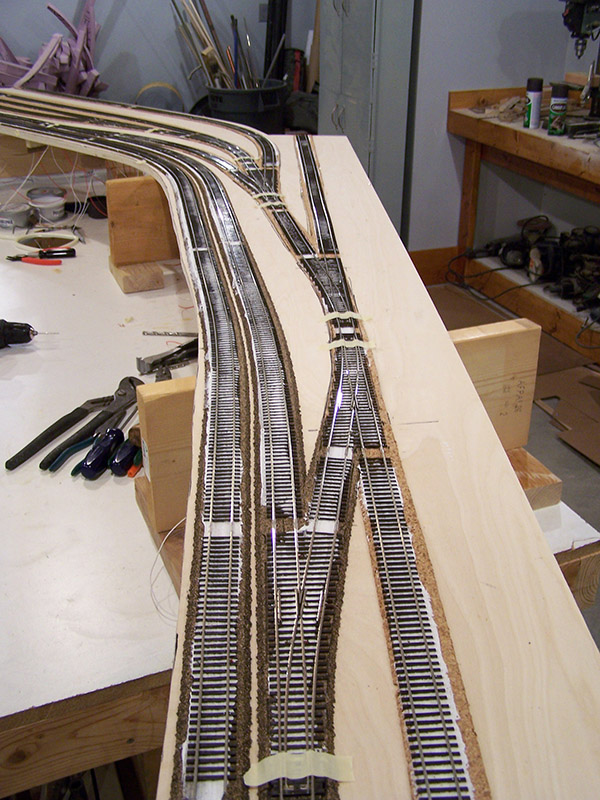
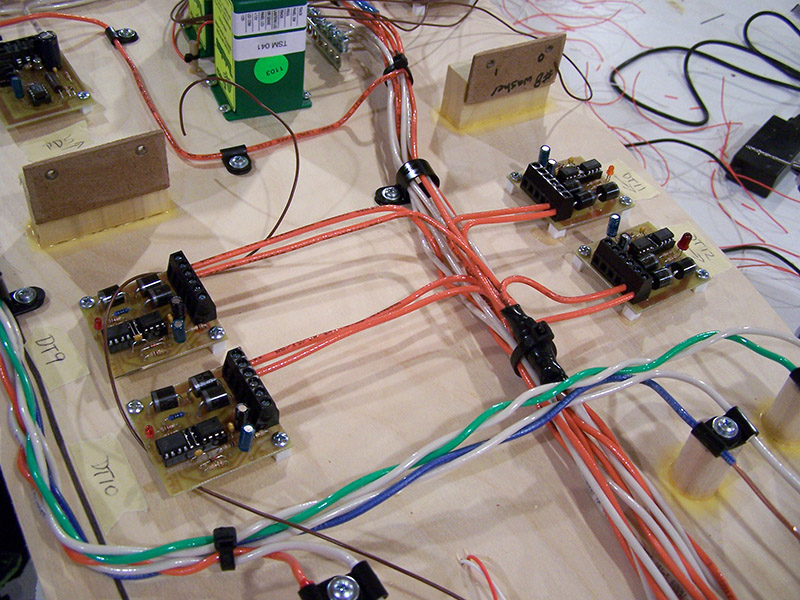
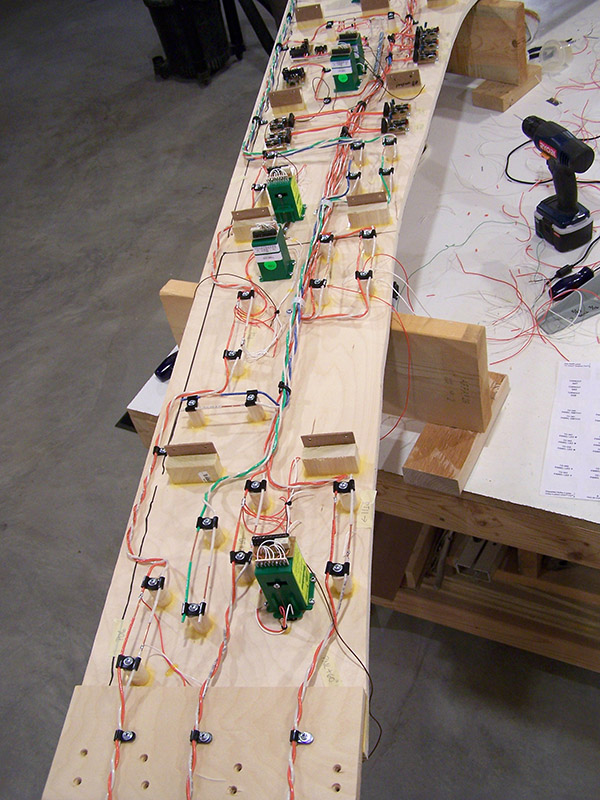
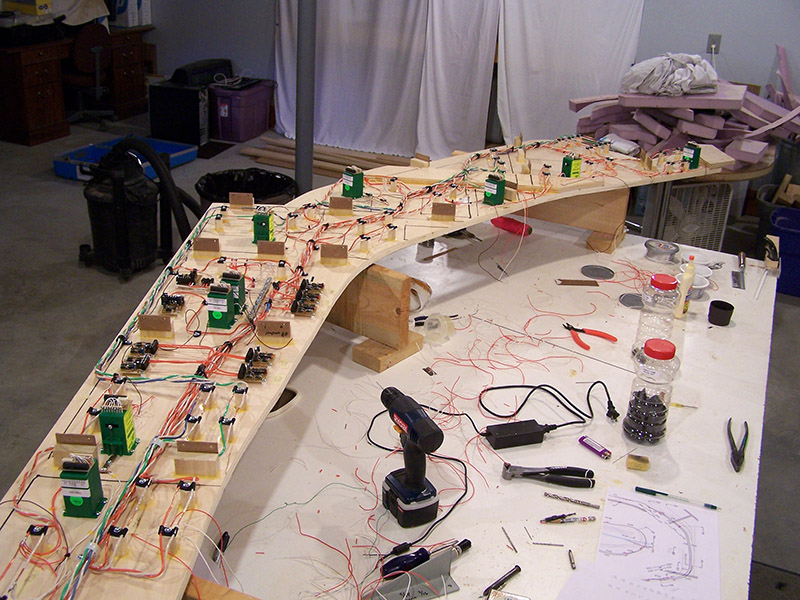
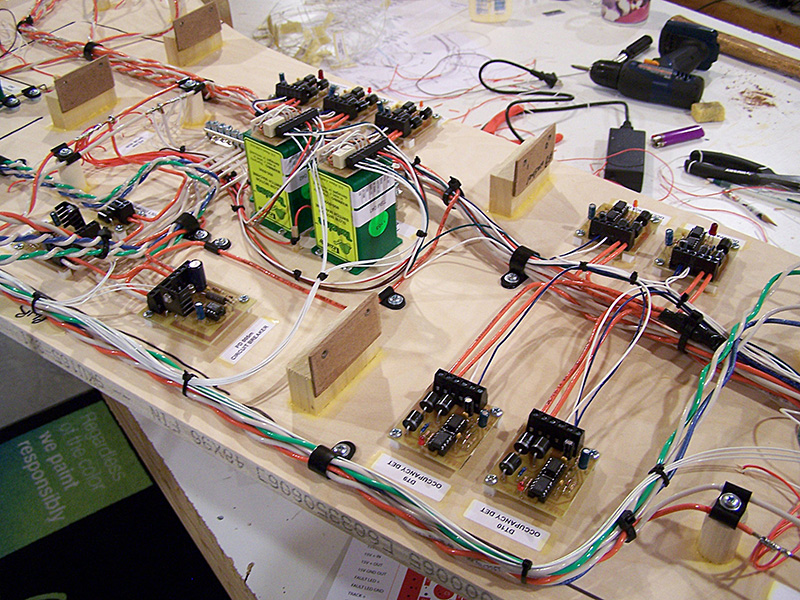
Geez, there are a lot of occupancy detectors on this module. Seven to be exact. This, combined with two power districts, made for a lot of wiring on the underside. The concentration of detection on this module is due to the standard signal blocks plus a pair of grade crossings in close proximity to each other on the main and siding. I want my grade crossings to operate like the real thing so each grade crossing needs three detection points – approach, crossing island, depart. Being close together the two crossings share an approach/depart section. How about a picture?
CB = Circuit Breaker
DT = Occupancy Detector
GC = Grade Crossing (a1 = approach/depart, i = island, a2 = approach/depart)
PD = Power District (“m” appended means mainline)
Green square = Tortoise motor
Red line = Detection boundary
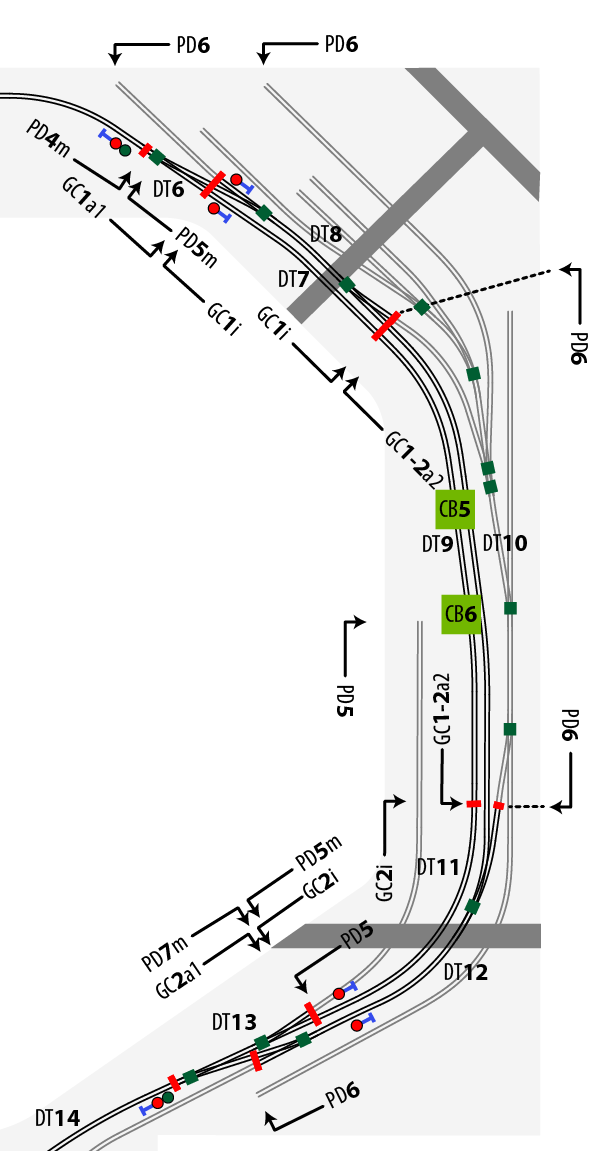
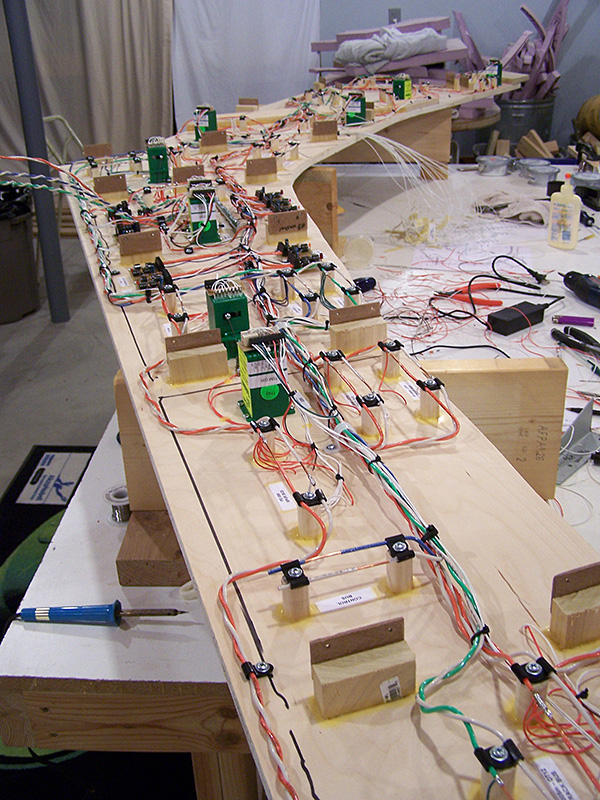
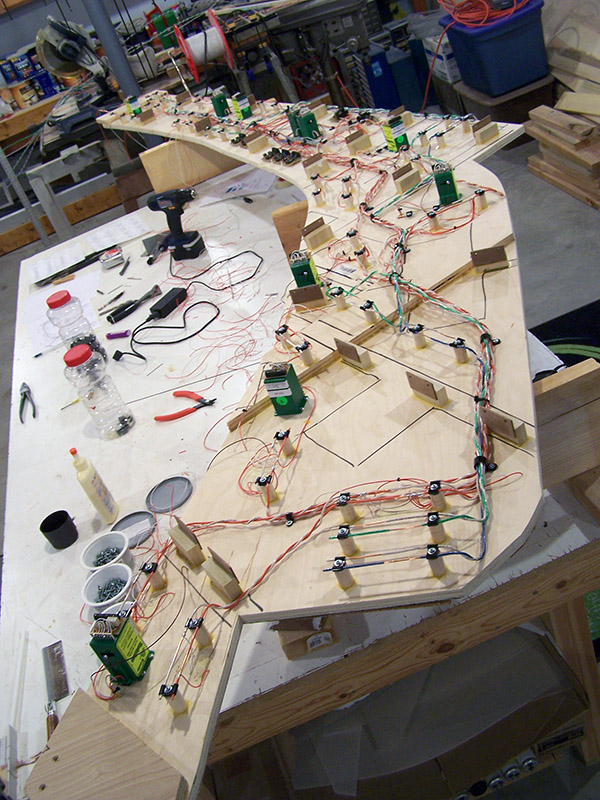
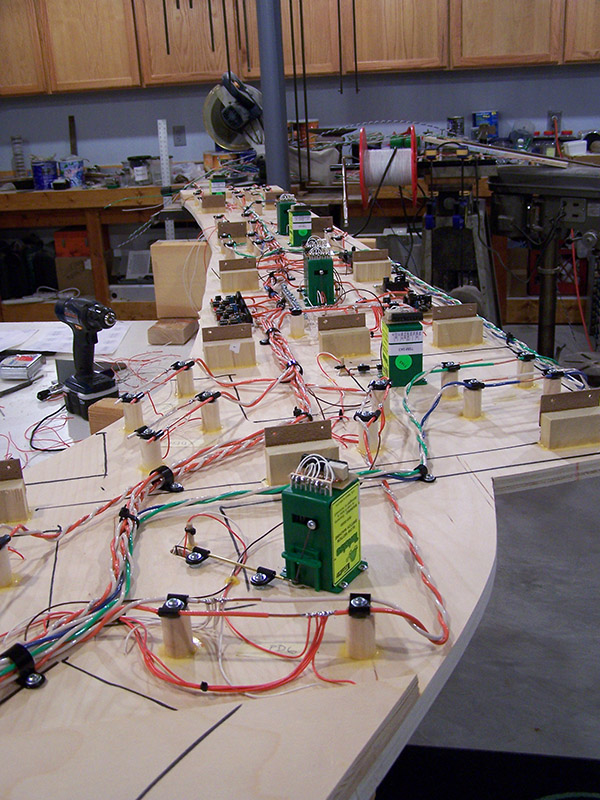
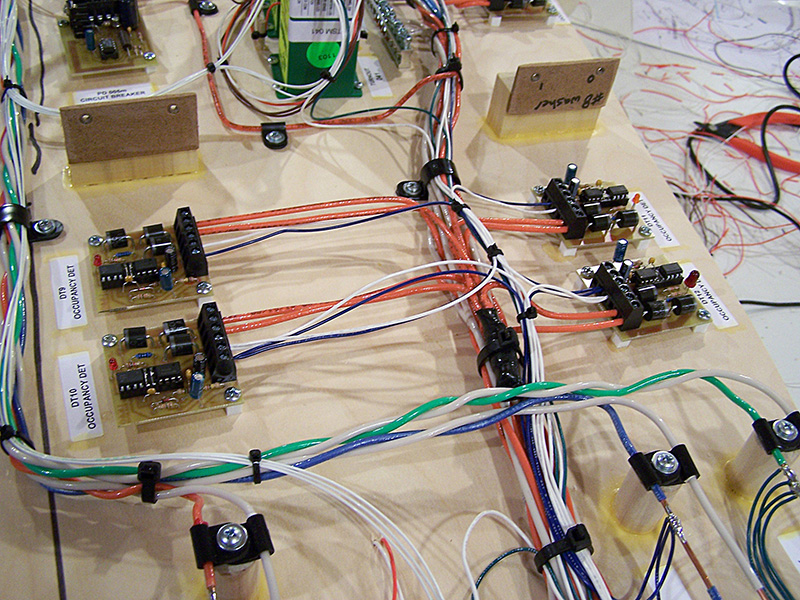
Here is what the arrangement yielded on the underside:
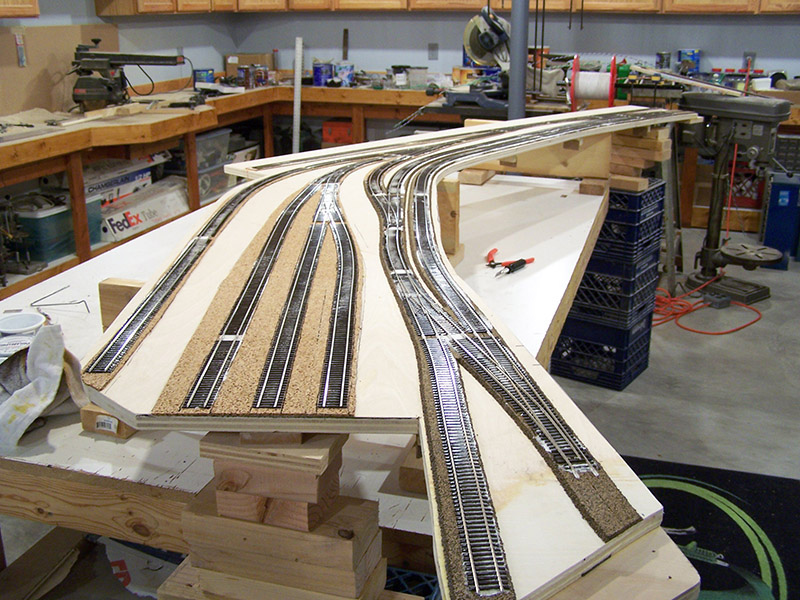
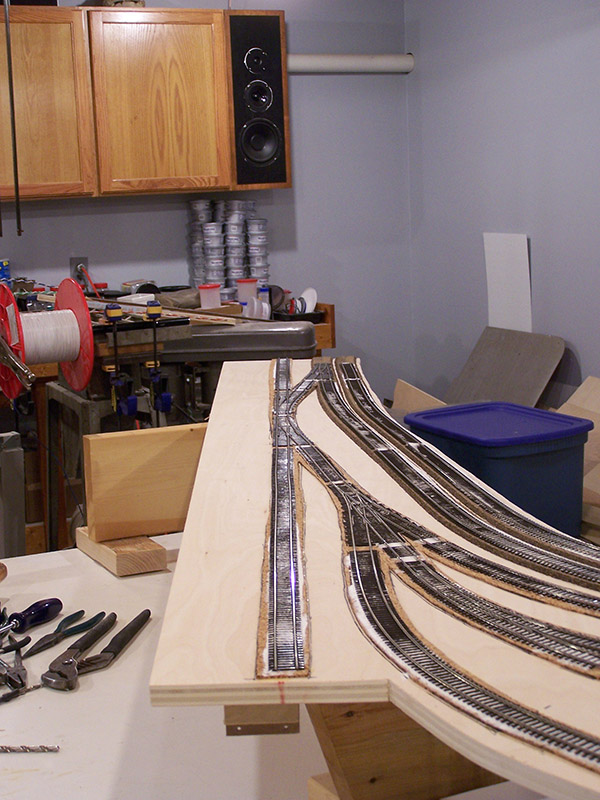
You may have noticed the switches at each end of the siding are isolated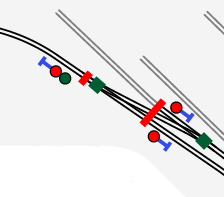 detection areas and are wondering why. The switch occupancy detection is at the heart of my, yet to be built, signaling system. In conjunction with the track occupancy detection on either side of the switch, they will be used to determine train direction. More on that when the time comes. For now, yes there is a reason why switches are isolated and individually detected. In fact, all siding switches are isolated throughout the railroad. Module 5 just happens to be their first appearance on the blog so an explanation was in order.
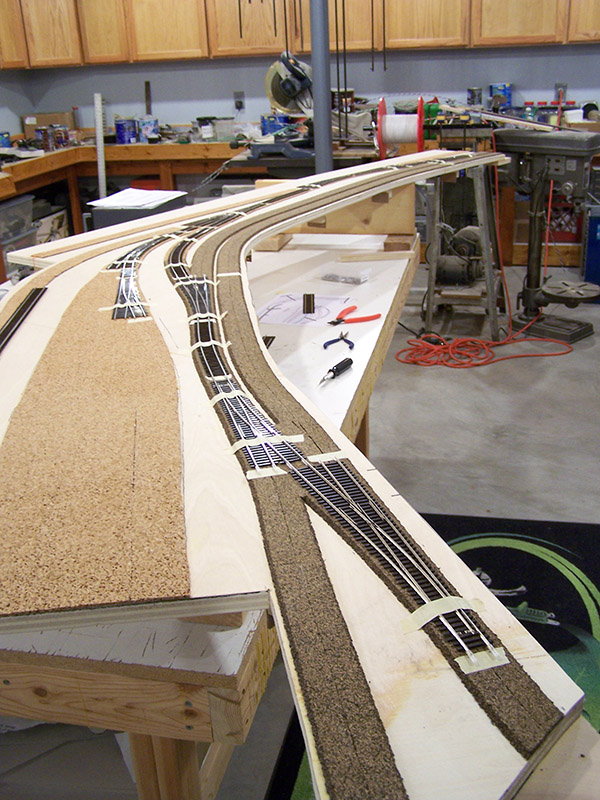
The light gray tracks in the illustration (no occupancy detection) are the Goodyear/Firestone/General Tire industrial spurs and spotting yard. The business side of the rubber shops are a key Layout Design Element on the LK&O. Imagine from the aisle you are looking at the backside of old, grungy, dirty, soot covered red brick Midwest factories. The side the public rarely saw. I grew up trouncing around those parts. Ah, the memories. The structures, scenery, and detailing in this area will keep me busy forever, as planned. 😉
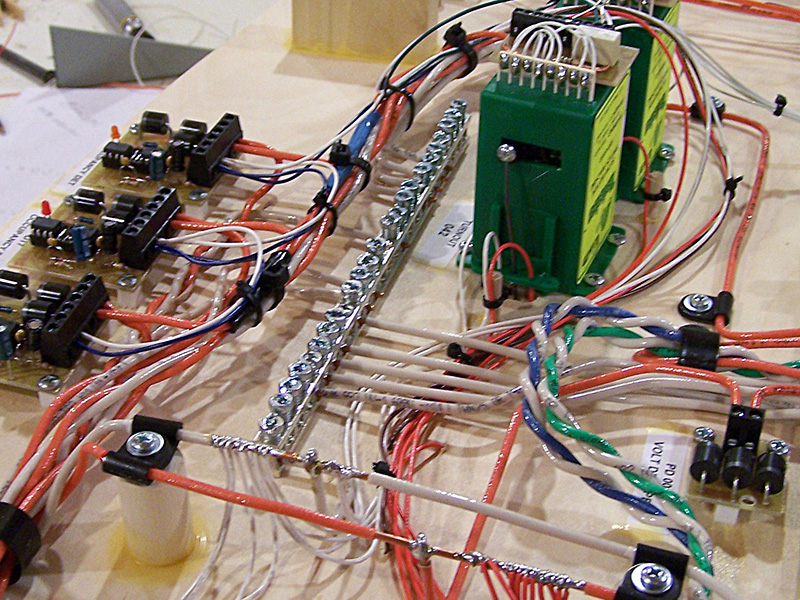
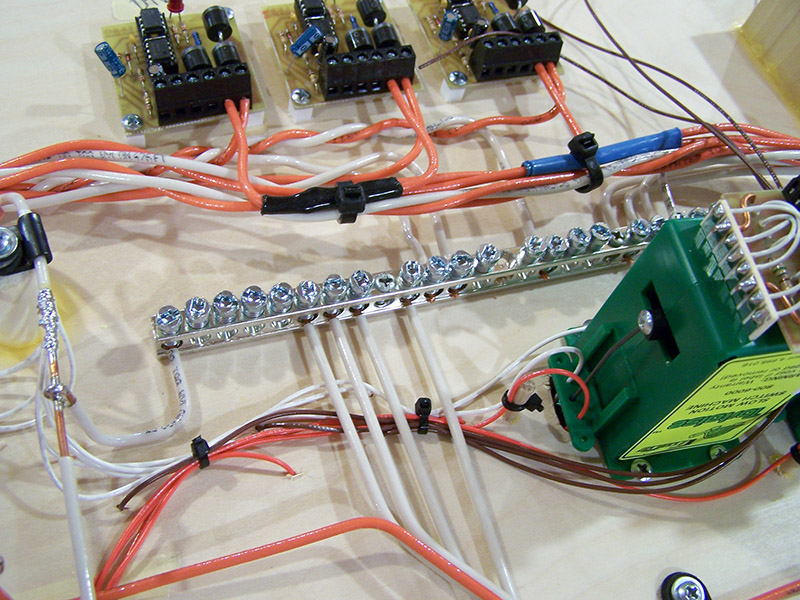
Grounded at the bar
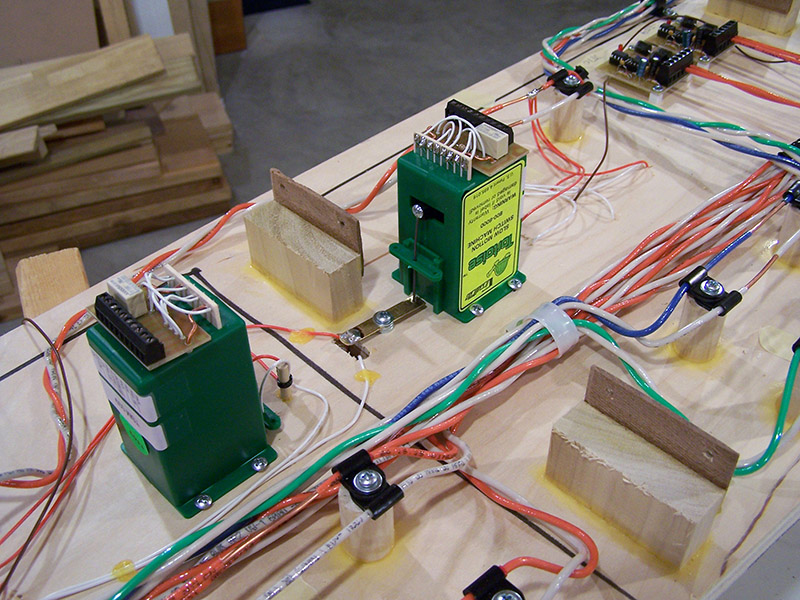
With so many individual track power circuits on one module it became impractical to simply solder together in a bundle all of the return leads. I needed something like a grounding bar in a load center. Hey! How about a grounding bar from a load center? Exactly what the doctor ordered. Module 5 is the first, and maybe only, module that has a ground bar. Made terminating multiple return leads orderly and painless.
Drat. Foiled by fermions
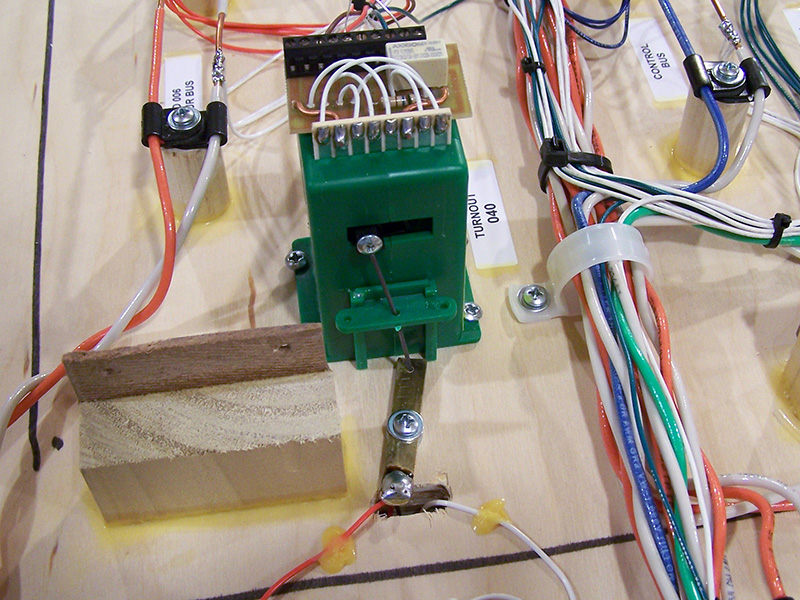
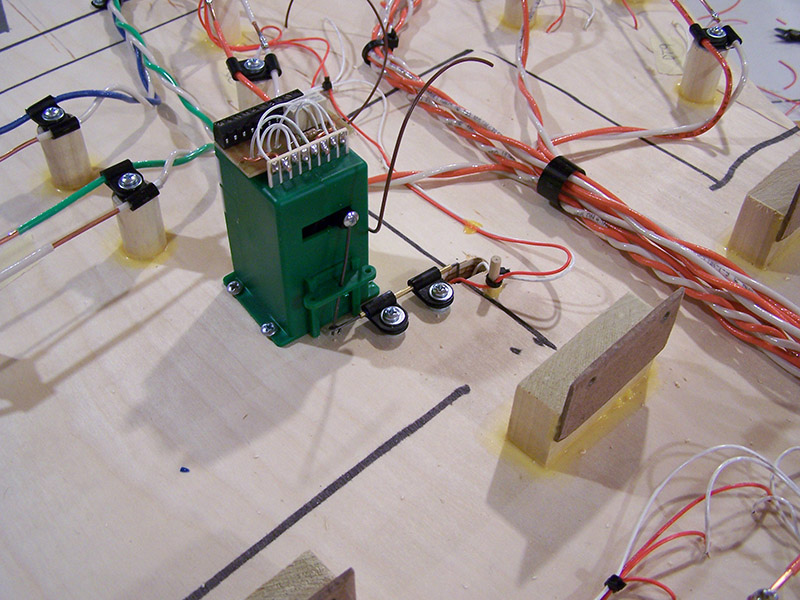
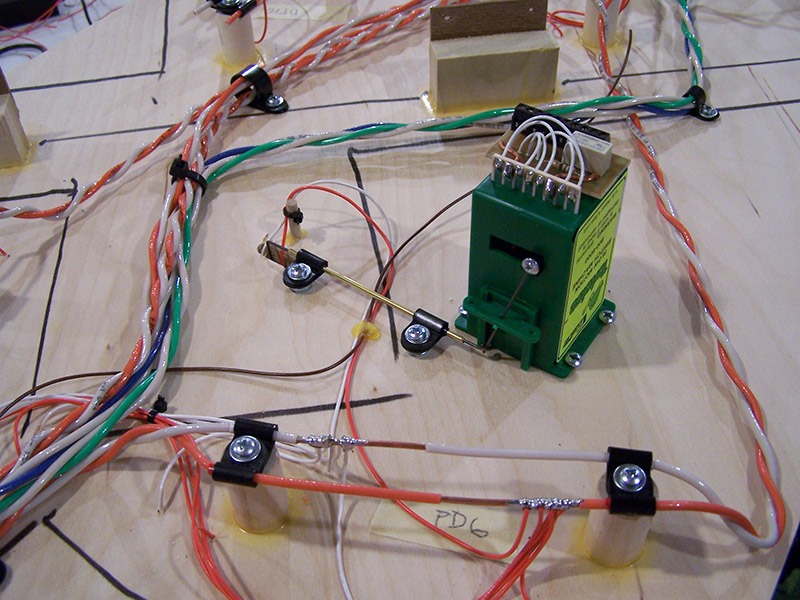
For long time readers perhaps you remember way back when I was building benchwork in a manner such that no Tortoise machines would be located directly over benchwork cross members. By and large that plan worked well. However, there was one area where a compromise had to be made – the room corner at module 5. I was faced with a choice. One cross member had to cross under a Tortoise machine location -or- I had to accept corner benchwork with very poor geometry which would not bode well for structural rigidity and strength. I chose the former conceding that I will deal with Tortoise relocation when the time came. That time arrived.
The Pauli exclusion principle being true prohibits a cross member and a Tortoise from occupying the same physical space. So, I had to fabricate offset Tortoise linkage. Brass flat stock to the rescue. It took a bit of trial and err to get the throw distance correct and soldering steel rod to brass stock proved to be a bit of a challenge but persistence prevailed. Check it out, it works great.
As a matter of fact, it worked so well that I decided to carry the idea further. In two other areas Tortoise positioning would have required lower deck light reflector trimming. I’ll have none of that now that I know how easy it is to make offset linkages. More brass!
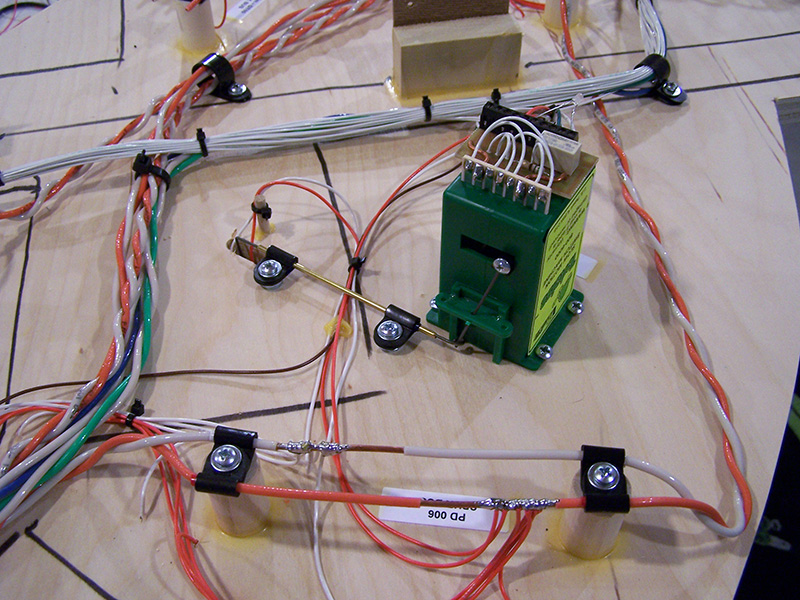
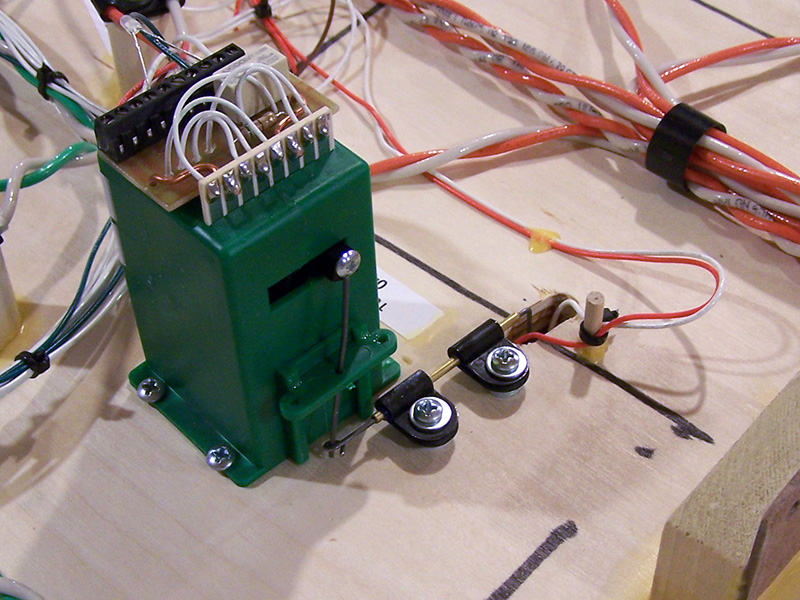
This time I used tube instead of flat stock. The tubing has an inside diameter just slightly larger than the wire OD making the assemblies free moving with minimal sideways slop. A little dab of wheel bearing grease coating the inside tube wall hopefully prevents long term wear. Several layers of heat shrink tubing brought the tube outside diameter up enough for the 1/8″ nylon clamps to get a firm hold. I am pretty dang happy with the way they work especially considering there is less than 10 cents worth of parts invested in them.
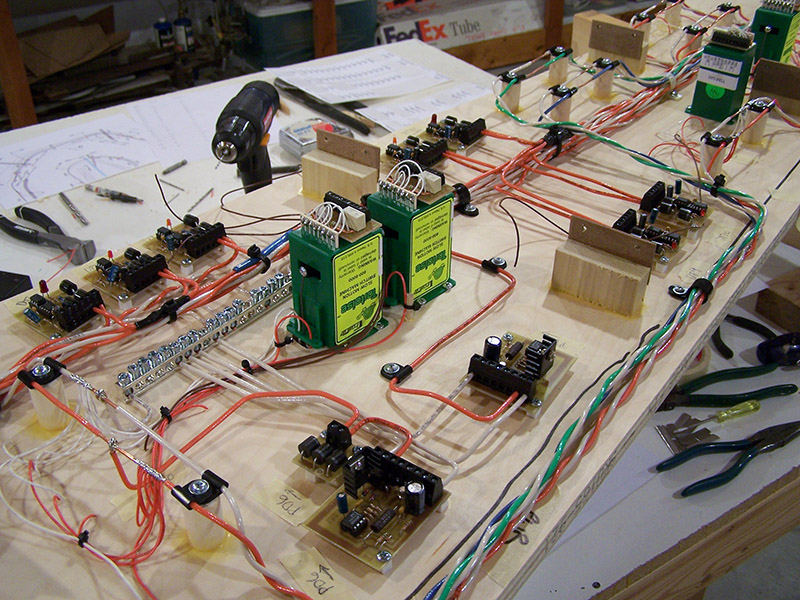
So there you go. Lots of detection, a grounding bar, and offset Tortoise mounts. Module 5 is a bit of a different bird than previous modules. At the moment the module is upright on the workbench and ready for final testing after which it will be put back into place on the layout. I love summer but sure did miss the trains. Let it snow!


Welcome back, Alan! More examples of truly fine craftsmanship in all areas. Great offset solutions on the tortise mounts, love your wire management. Look forward to more installments.
Glad you are back at it Alan. I found your site this summer and read every post. I finished catching up about the time of your last post. I am very impressed with your work. I am starting a layout and hope I can have one at least half as nice as yours. Thanks for sharing the knowledge.
Glad to see your right back into Alan, I’ve been accused of having OCD level wiring but I think you take the award for the most organised and tidy it is simple astonishing the level of detail that you pay when installing it.
Those brass bus bars are exactly what I was looking for when wiring in all the common return wires for our detection and power, just couldn’t find anything suitable down here.
Looking forward to seeing many more updates as your winter sets in. Jas…
Thanks for the kind words guys. It is good to be back workin’ on the railroad.
Alan,
Great to see that you are back updating your website. I’m learning so much from your post. Incredible attention to detail!
Thanks for sharing.
Cheers
John