Another day, another module. 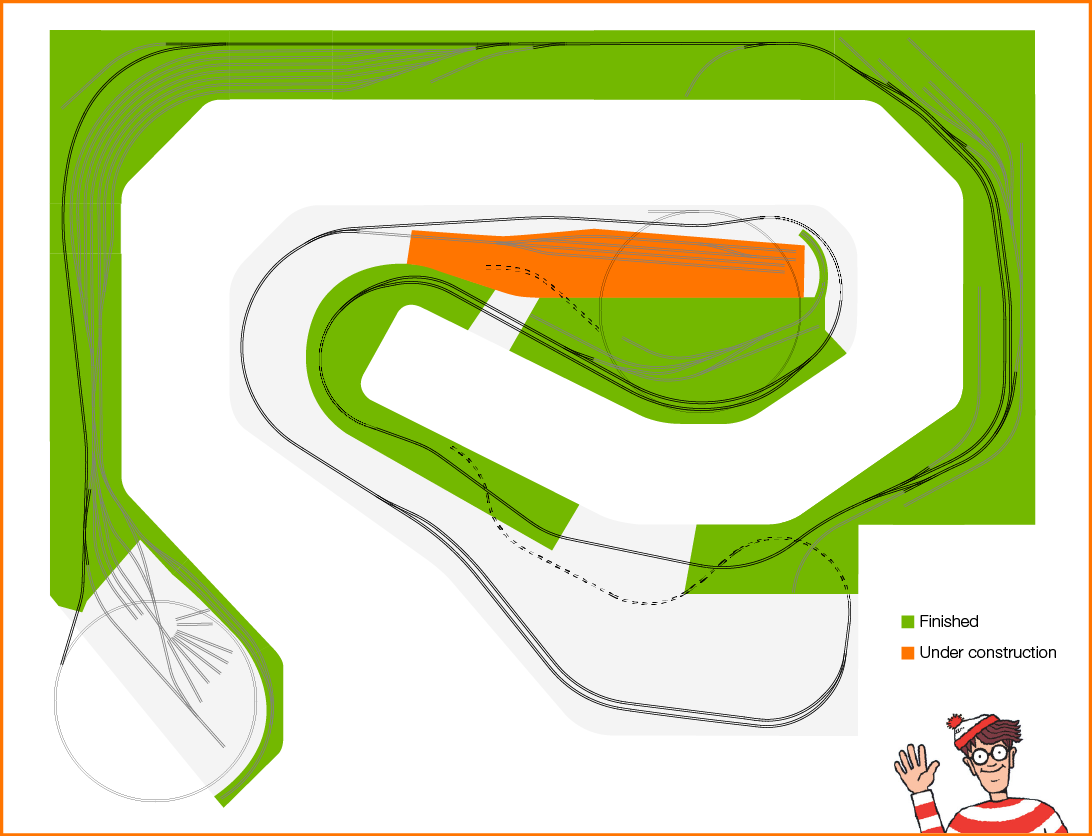 Or should I say… another month, another module. It is a hobby, right? No rush. Module 10 is the Mettiki Coal Company tipple tracks. A previous post hinted at what I have in mind for this scene. Everything blackened with coal dust, long strings of loaded hopper cars awaiting being pulled or empties returning for another load. Scenery building will be insanely fun on this module!
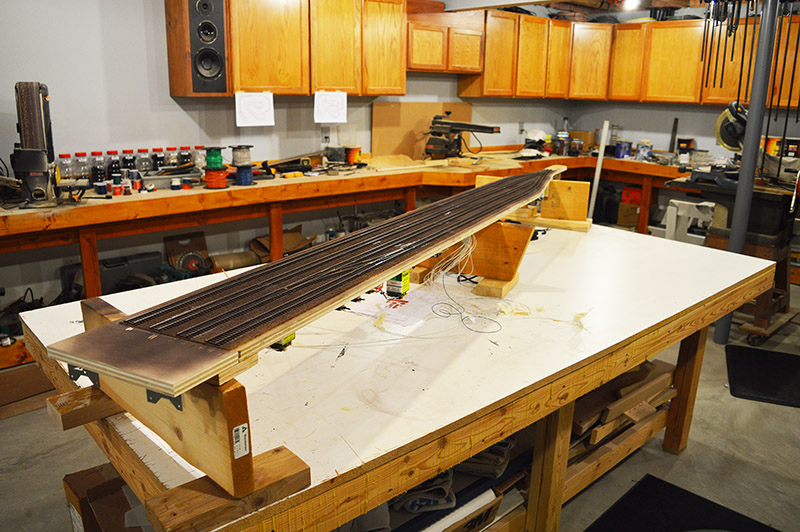
 Assembly-wise it was a very easy module. Basically straight tracks and a few switches much like a little yard. No occupancy detection kept the wiring relatively simple too. The wiring could have been dirt simple if I were not so committed to every rail having a feeder wire. Still, it was an easy build that moved along quickly.
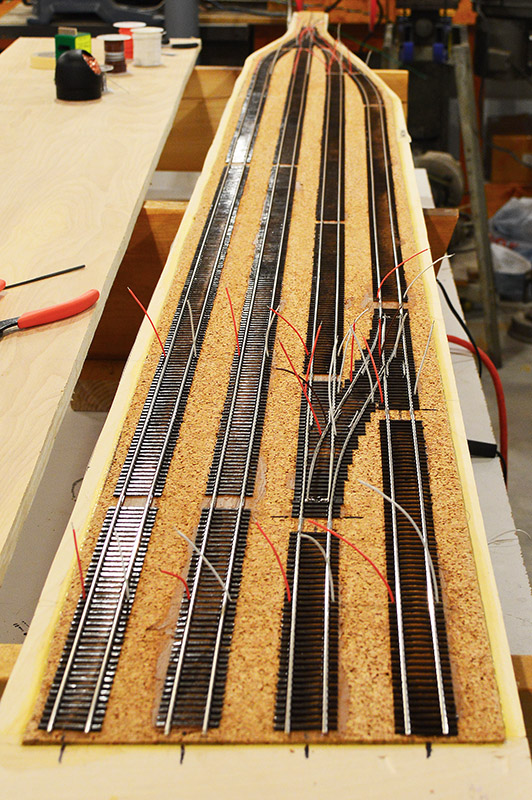
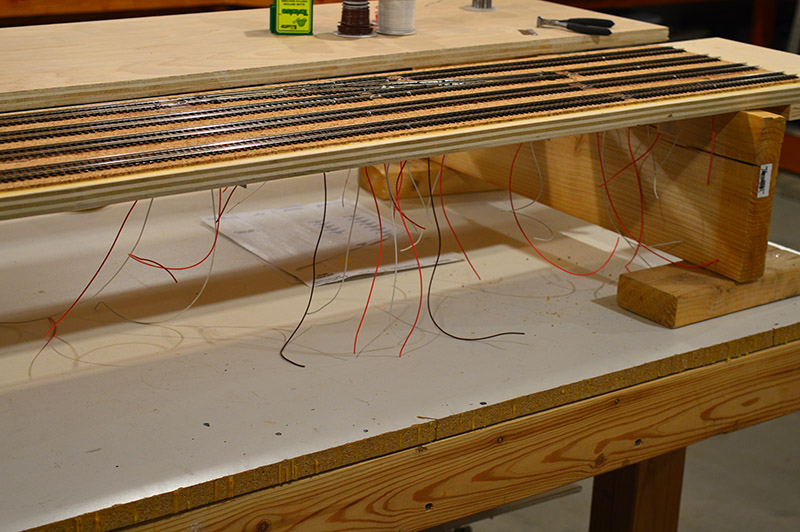
Here you can see the track glued in place and the feeder wires dropped ready to be soldered to the rails. Like modules before, switches require a lot of feeders – 6 to the rails, 2 to the points, and a frog wire. Lots of wire but the beauty is I am not at all dependent on the factory rail bonds.
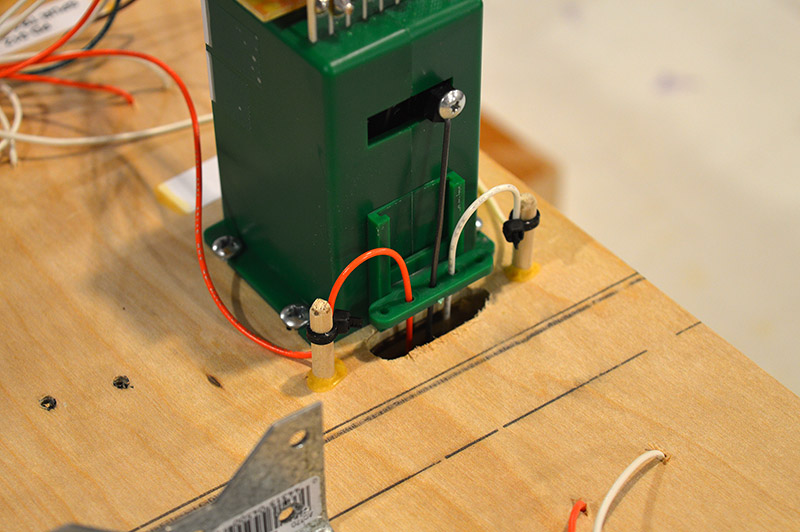
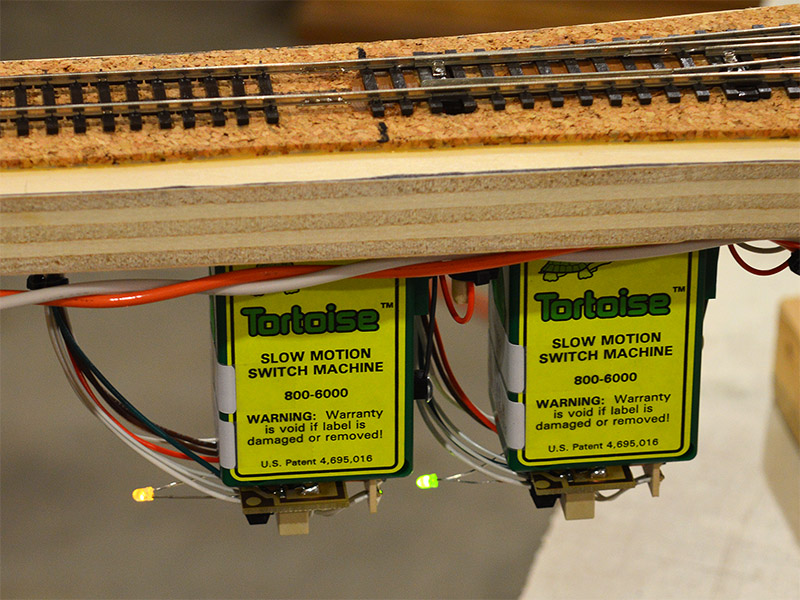
It does get rather intense wiring a 3-way switch which this module has at the mouth of the loading tracks. There are a slew of little short rail sections on a 3-way. In addition to the wires that can be seen in the photo there are also two pairs of point rail feeders hanging out of the bottom. So many feeders makes for a congested supply rail tie-up on the bottom side too.
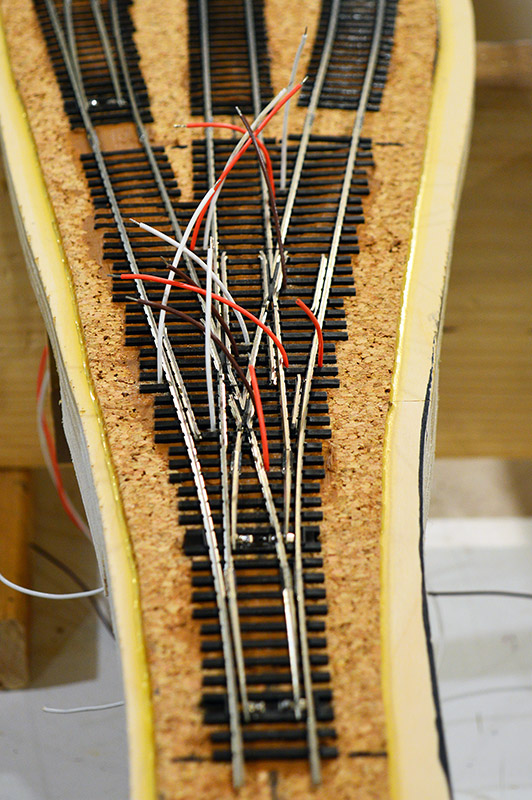
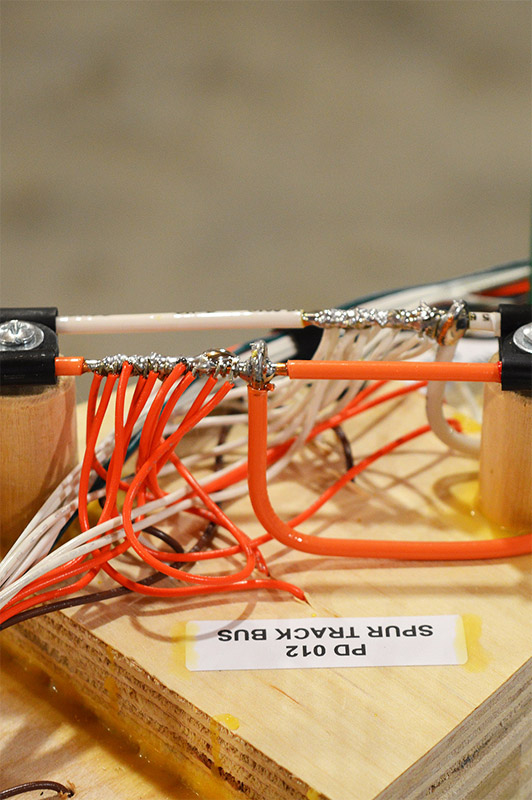
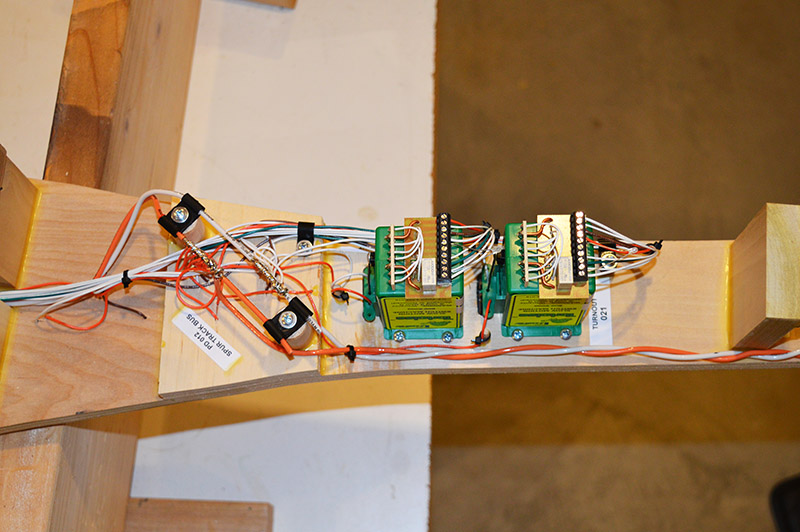
Adding to the congestion is the pair of switch motors needed to operate the 3-way. All on a narrow piece of sub-roadbed.

Soldering all those feeders seems like a real chore when you first think about it. But it really isn’t bad. I get into a rhythm and away I go. Tons of soldered feeders in no time. After soldering and pressed down into their hole (fingernail works great) and a coat of camo brown paint the soldered feeders virtually disappear.
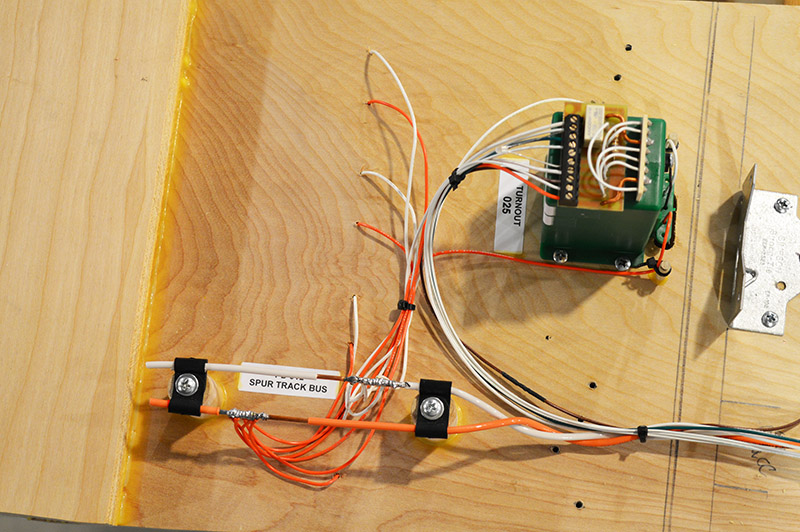
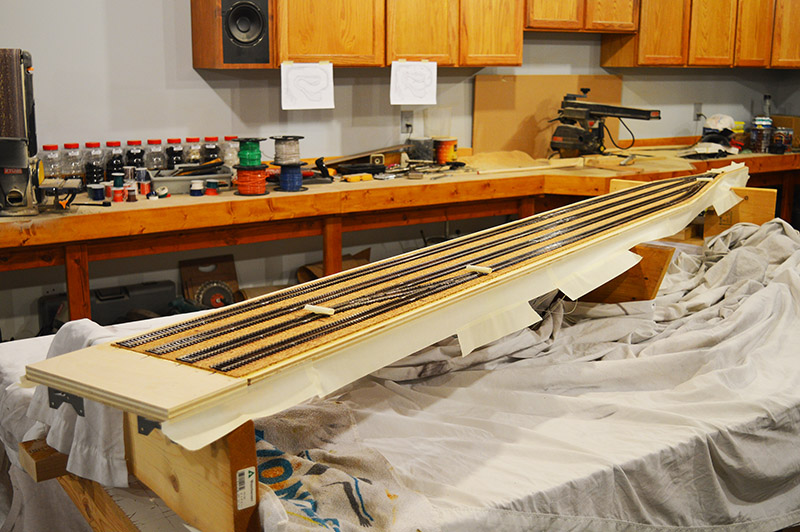
Elsewhere on the module it was wide open spacious area for wiring and components.
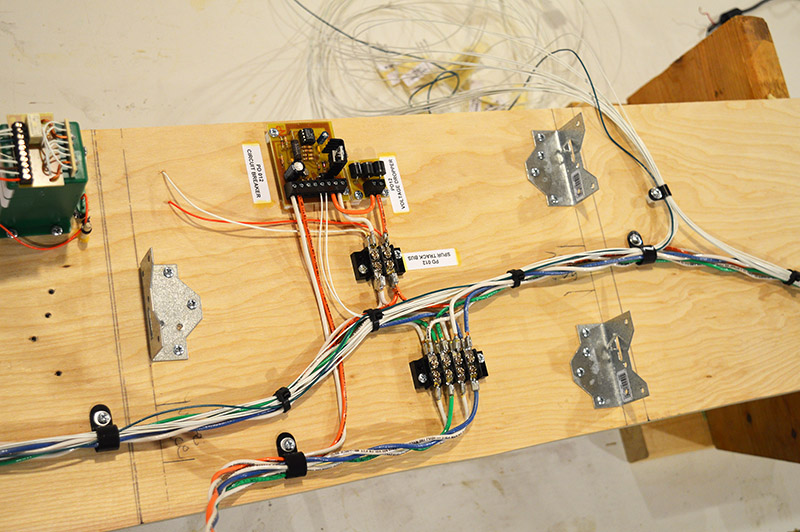
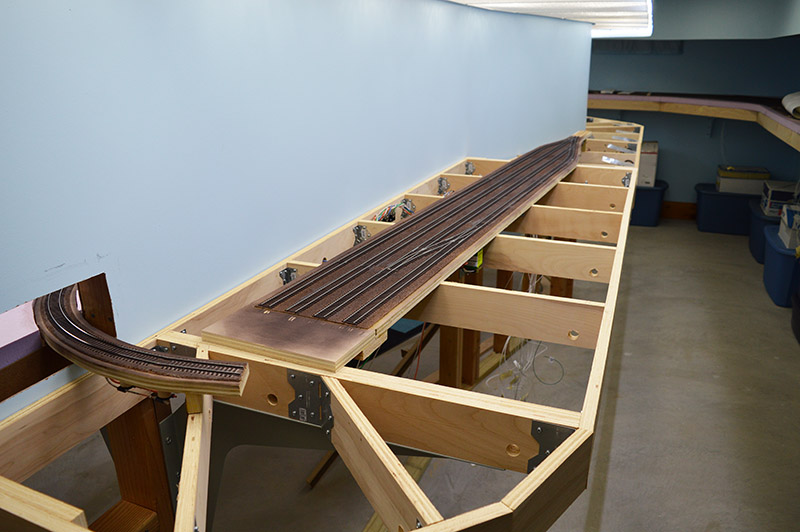
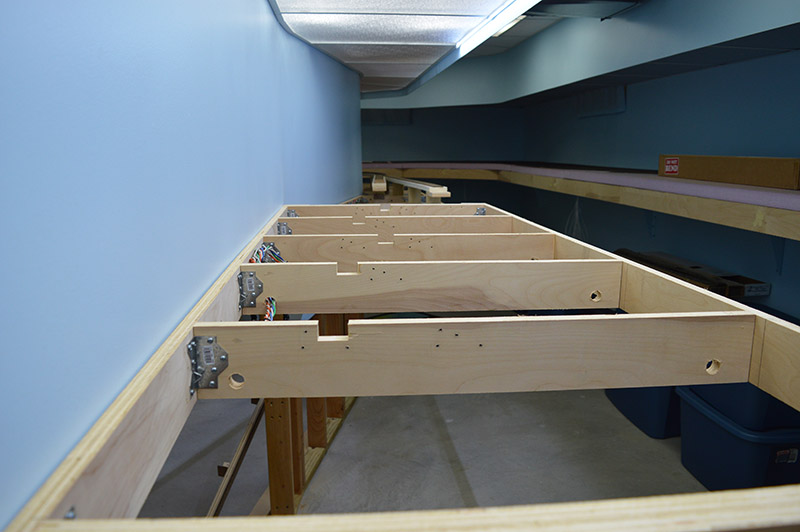
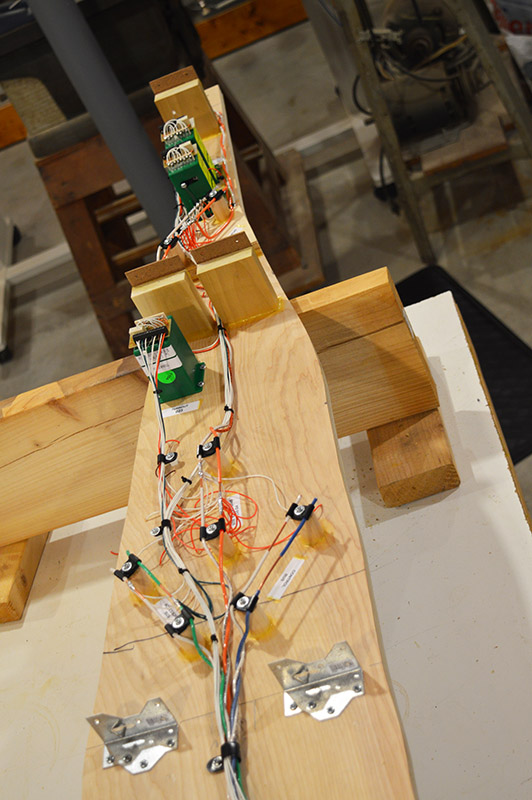
Module 10 is the only module that sits directly on the benchwork. At least part of it does anyway. All other modules sit atop risers. This module is direct to benchwork so I could get some grade difference between the mine and the main that runs alongside of it. Just to add some visual interest. Besides, there is no need for any below roadbed terrain at the mine. The nailing angles seen in the above photo attach the module to the benchwork.
Wire paths
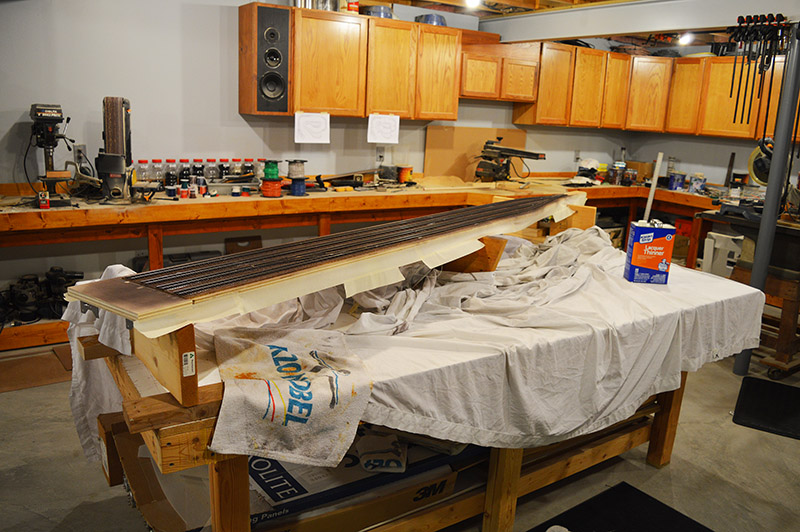
Having no risers means there is no open path for wires to cross above the benchwork cross members. That problem was solved by using the router to cut wiring raceways in the benchwork.

Typical of router work, it takes far longer to clean up all the fine sawdust thrown everywhere than it does to make the cuts! I like my train room clean and clearly the router does not. 10 minutes with the router, an hour with the shop vac.
Almost an oops
Here is a little tip for you to prevent the same mistake I came dangerously close to making. Make sure there is access to replace ties removed for rail joiners. The diverging legs on both turnouts at the engine escape crossover were shortened to create the right alignment with the mine tracks. I peeled away the ties, cut and filed the rails, installed rail joiners, and was ready to start gluing down track when I realized there would be no way to put back the missing ties after-the-fact. I had caulking gun in hand when I made the discovery. Boy, that was close. I flipped the switch pair onto their back and glued ties to the bottom of the rails. Track installation commenced the next day.
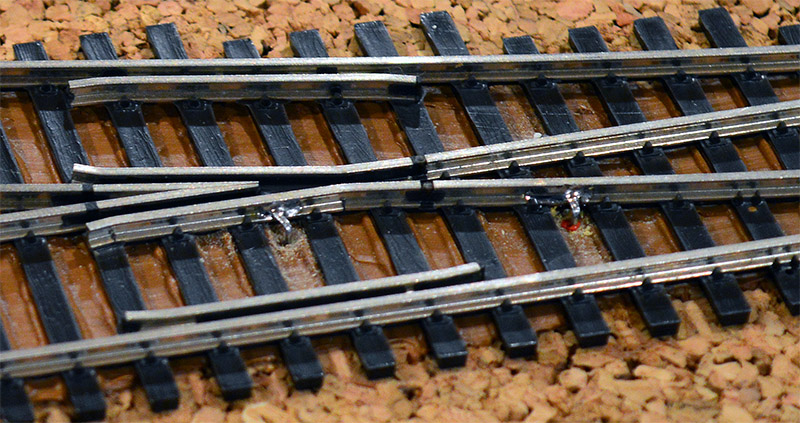
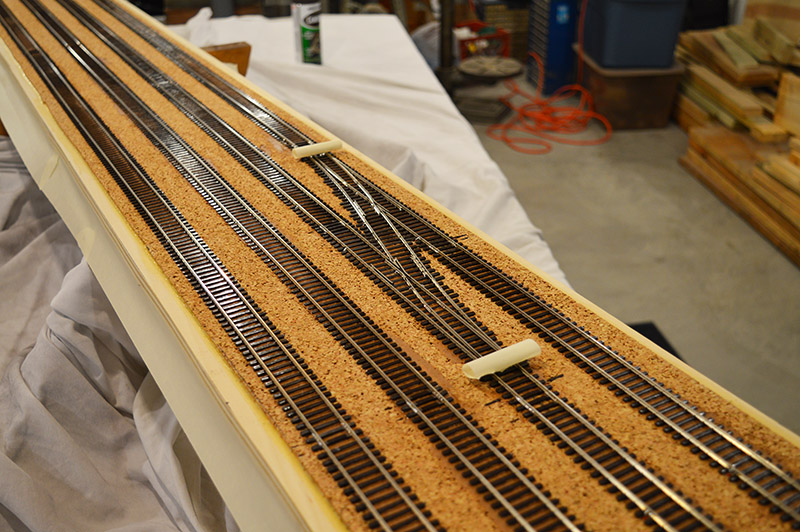
Look closely at the photo below. Notice the three ties under the rail joiners connecting the two switches. They stand out because they are missing their rail spikes. They are the ties I would have had no way of replacing with the switches glued in place.

Throwbar friction
Another tip. I noticed on earlier modules that every once in a while a switch would not move as smoothly after painting. The issue was eventually determined to be paint on the sides of the headblock ties. The paint is not as slippery as the plastic the ties are made from. When the throwbar moves back and forth it was riding on paint instead of slippery plastic. The problem was easily fixed by scraping away the paint. This time however I decided to prevent the problem at its root. Little rolled up pieces of masking tape placed over the throwbar before painting did the trick nicely. Provided just enough protection from direct paint spray. I’ll continue to do this from now on.
Testing
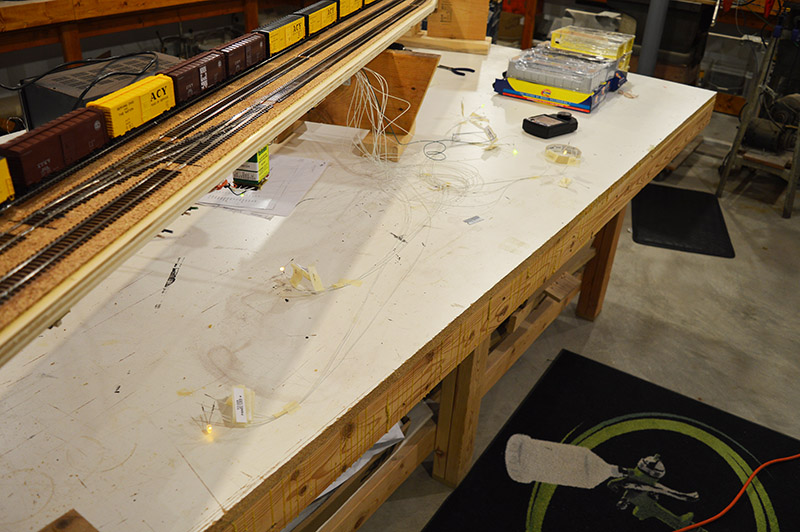
Track testing was especially fun on this module. Not content to simply run a locomotive back and forth or hand push a few cars to confirm everything was proper, I couldn’t resist the urge to do some actual switching. Two sections of flex track were hastily placed onto an impromptu extension (piece of plywood on milk crates) so a train could clear the throat switch and a whole string of AC&Y boxcars, straight out of the box, were put on the rails.
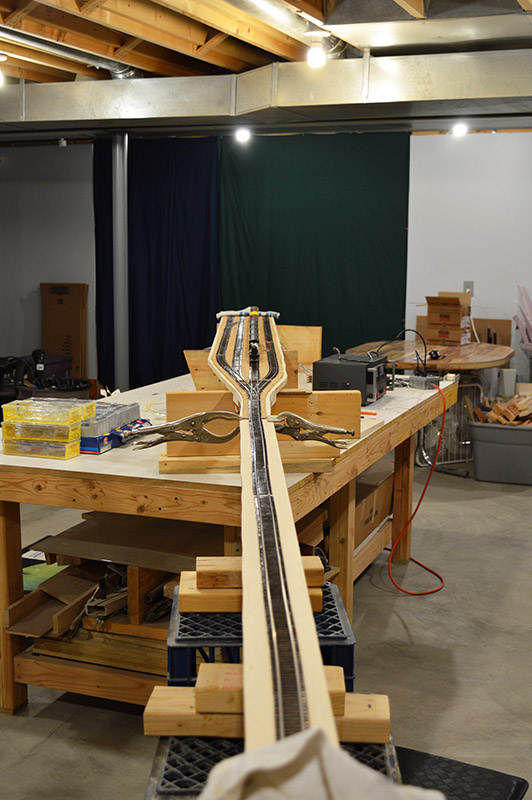
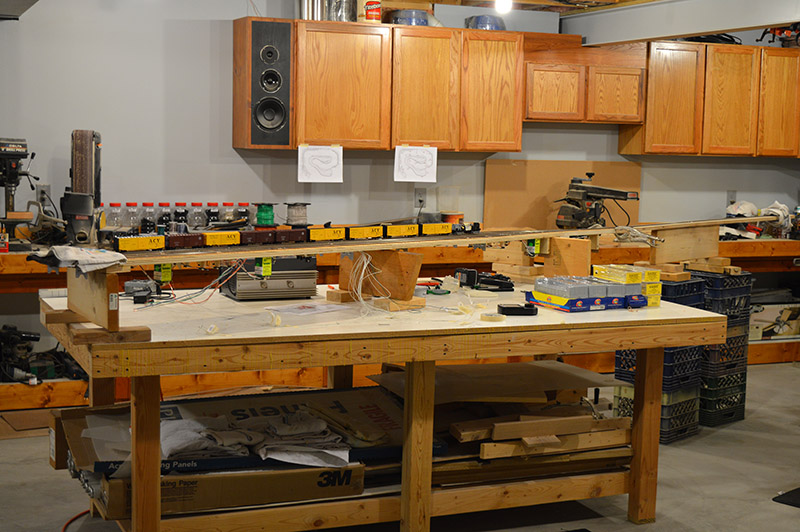

I must admit I had a blast! And to make everything even better, there was not a single derailment in over an hour’s worth of playing. Umm, I mean testing. 😉
Up next, the big broad curve through the mountains heading toward Kitzmiller.


Feeders up!
Some solutions are so simple that I sometimes despair at my own intelligence. I have recently been contemplating means of attaching feeders to trackwork before it is laid and then handling the laying…and none of my thought experiments came near to anything so simple…
It’s like “Duh.”
The virtues of tracking other peoples efforts.
David,
Just so you don’t go astray, it isn’t actually feeders up. It is feeders down. After the track is glued in place feeder holes are drilled from the topside and feeder wires dropped through. The feeders are soldered to the rails and then the whole assembly is flipped upside down. On the bottom side the feeders are cut to length and soldered to the bus wires. It is an easy process and results in exact length feeder wires.
It’s like “Duh”.
Enlarge the pictures, Lighting!
Oh, well…ideas that may be “astray” are still dancing.
Thanks!
Enlarge the pictures, Lighting!
This flikr album has every LK&O photo at original size: https://flic.kr/s/aHsjKAxBMe
There are 2500+ photos so you may have to do a bit of scrolling.
Oops, sorry Alan. That was supposed to read “Lightning”, an ironic reference to my own brilliance. Saw the true nature of the feeders when I clicked on the images and made them larger.
Not sure how you interpreted it…smart A’s should proof read their missives to prevent unnecessary confusion.
Crawling back into my hole.
I thought you wanted bigger pictures that are more well lit. Valid request since my photography skills are almost nonexistent.
Hi Alan – great to see a train running.
I new you would eventually weaken 🙂
I am staying true to the plan Rob. Trains have been run on each module on the workbench to verify track work. Sometimes more than others as was the case on this module.
The big day when trains run on the actual layout has yet to come.
Just joshin’ Alan.
Standard ops, Build in quality, Right first time. It absolutely works and on a railroad of your size and complexity. a sound (if not essential) strategy.
Incidentally – missing your ‘tough love’ over at MRH 🙂
Alan, Glad to see things moving along so nicely. I can’t help but think of a John Armstrong quote regarding layout design and building when I read your threads. Some folks design everything in great detail and then put it all together like building a bridge. I would say you are the best example of that except your likely doing a better job than the builders of bridges from what I have seen of their work! Miss seeing you on the MRH site.
Rob, is that a good thing or a bad thing? 😉
Alan – for me it’s a bad thing you are ‘quiet’ on MRH. I always greatly valued your opinions. Your honesty is refreshing and your criticism always insightful and constructive.
I will second the sentiments of Rob Clark. I always thought you added a great deal to the place and you were one of the guys whose posts I followed regardless of the topic!