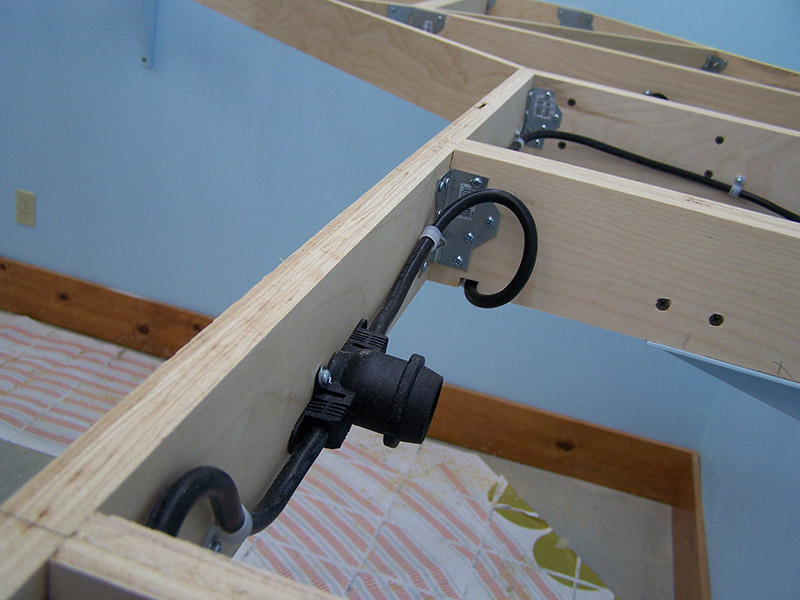
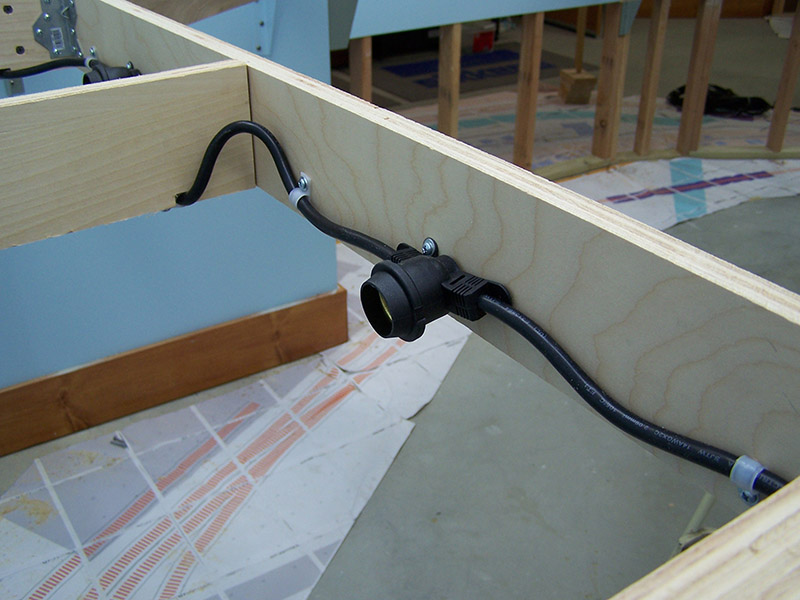
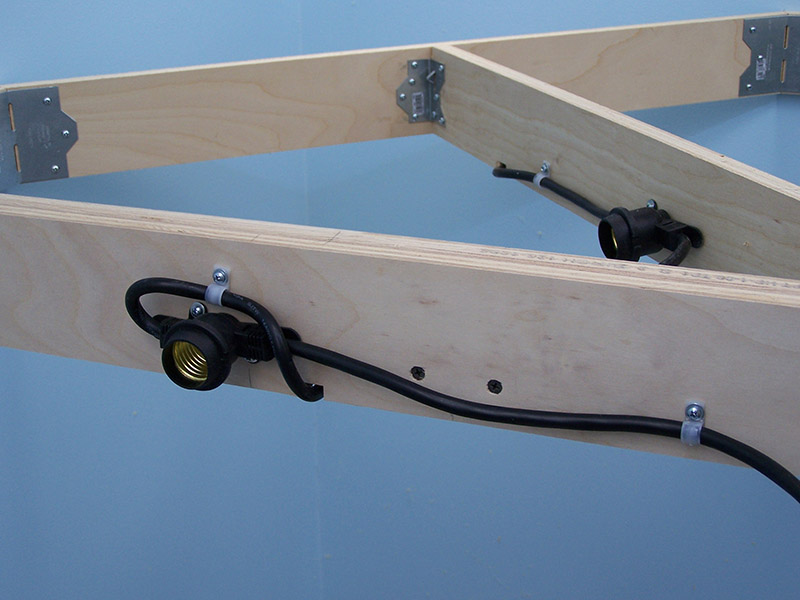
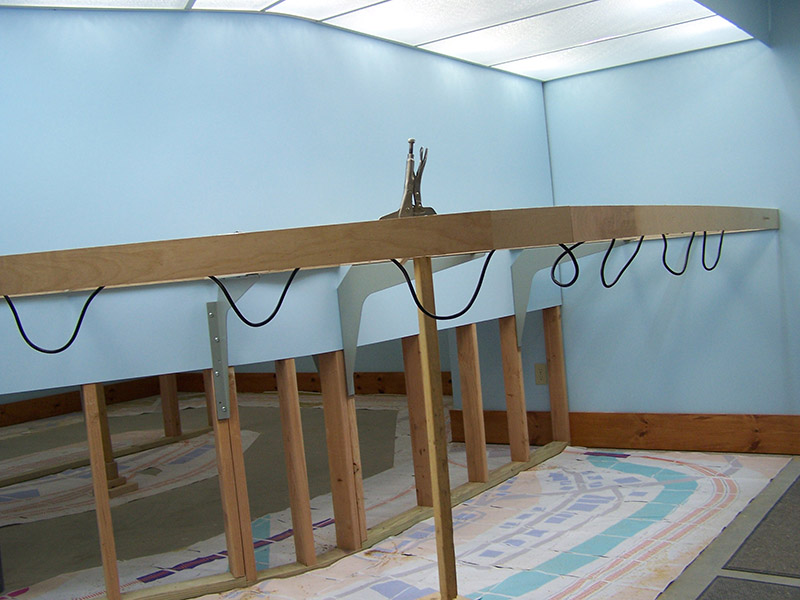
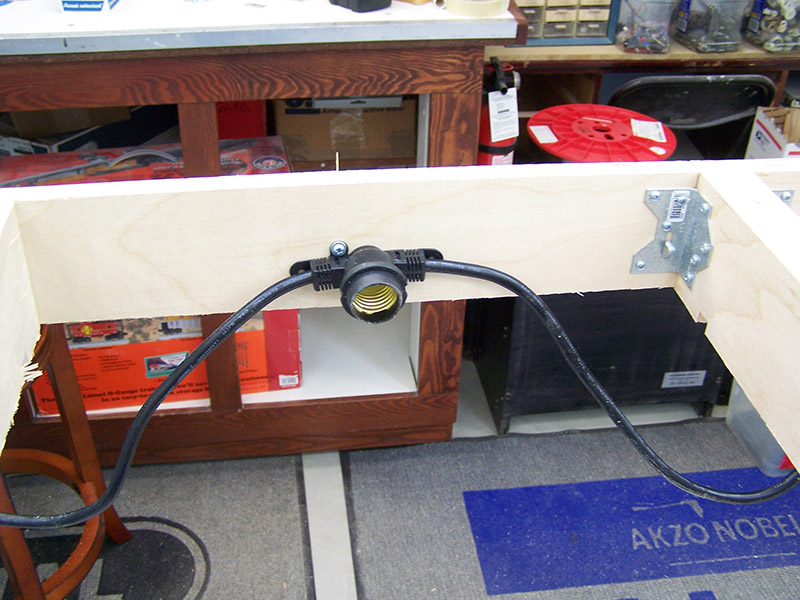
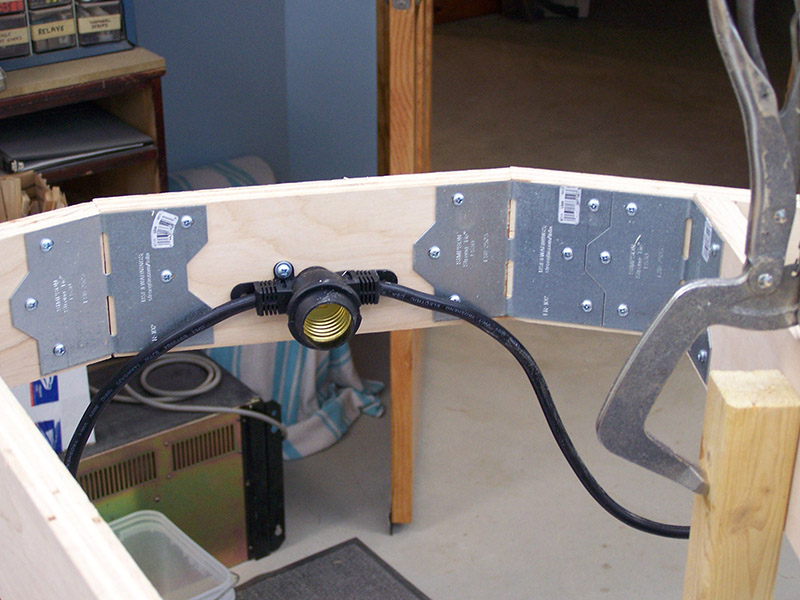
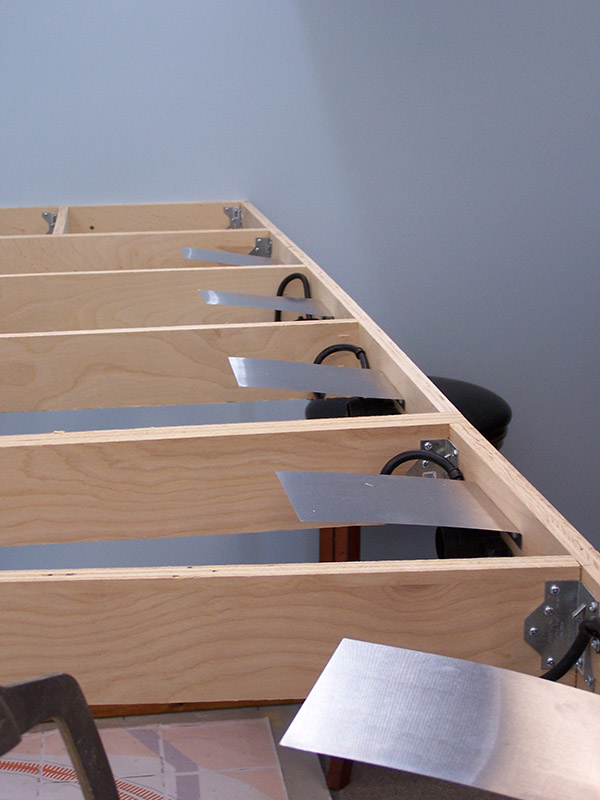
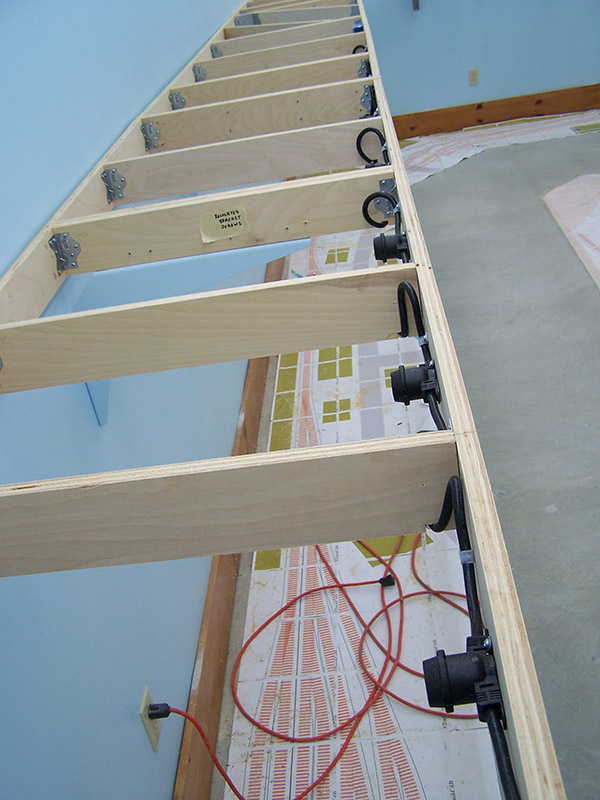
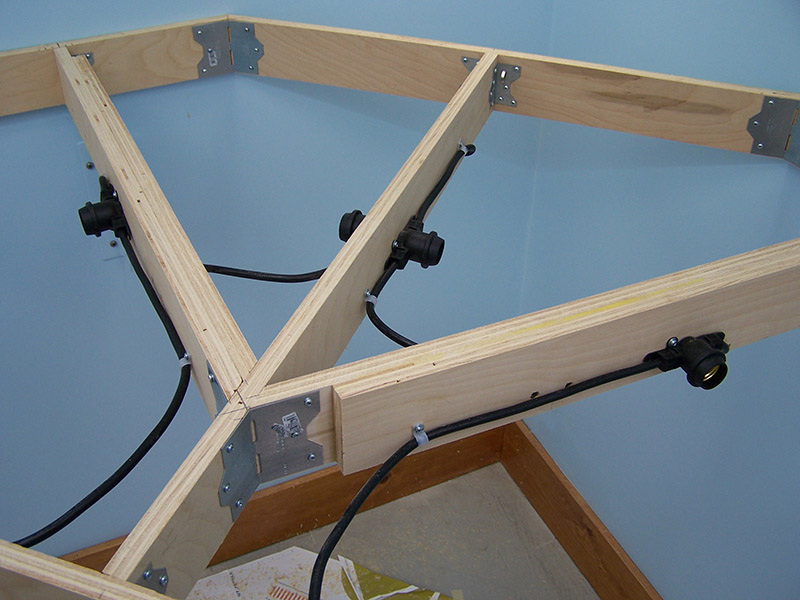
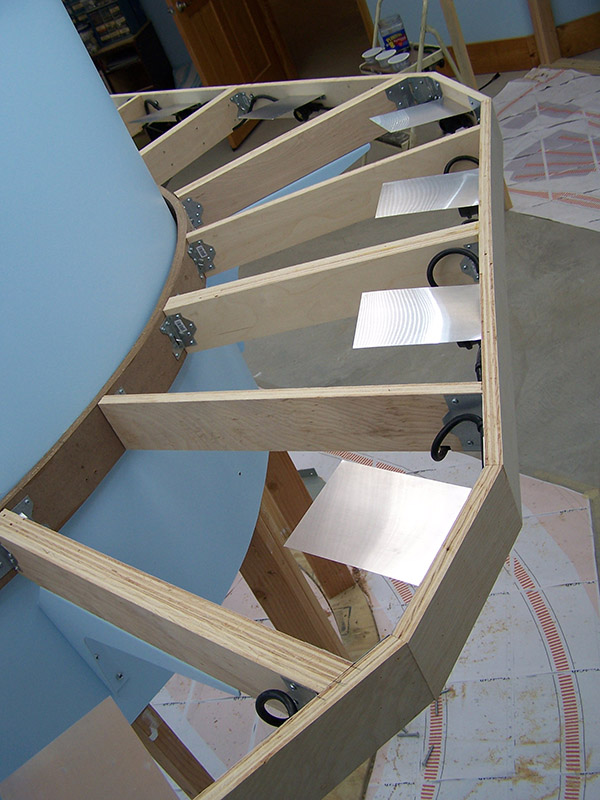
Making good headway on the lower deck lighting. The Party Light strings are installed and I have begun on the reflectors. There is a lamp socket between every cross member. Turns out the 24″ spacing of the light strings works quite well on 16″ centers. The extra bit of cable gave me flexibility of lamp location and there is not so much extra cable that it is problematic to route. Burned through like a gazillion nylon clamps and #6 screws securing everything! All in all, worked out sweet.
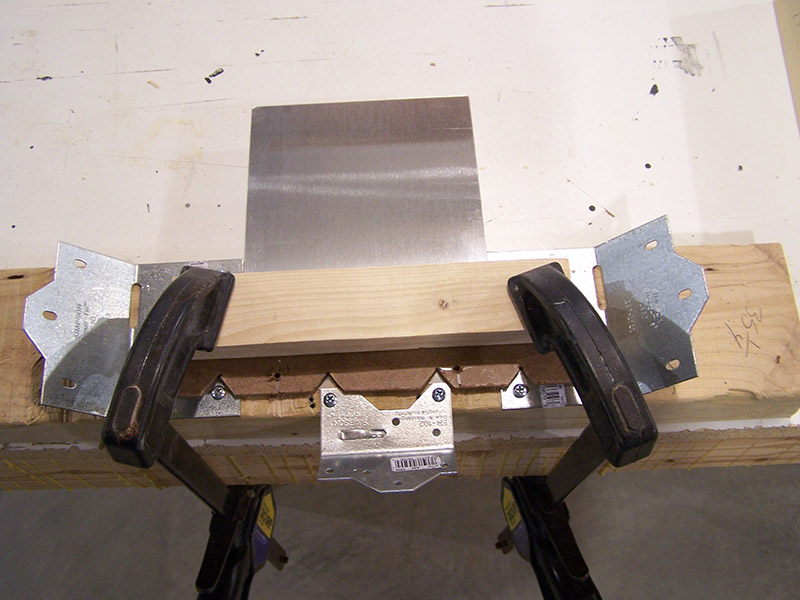
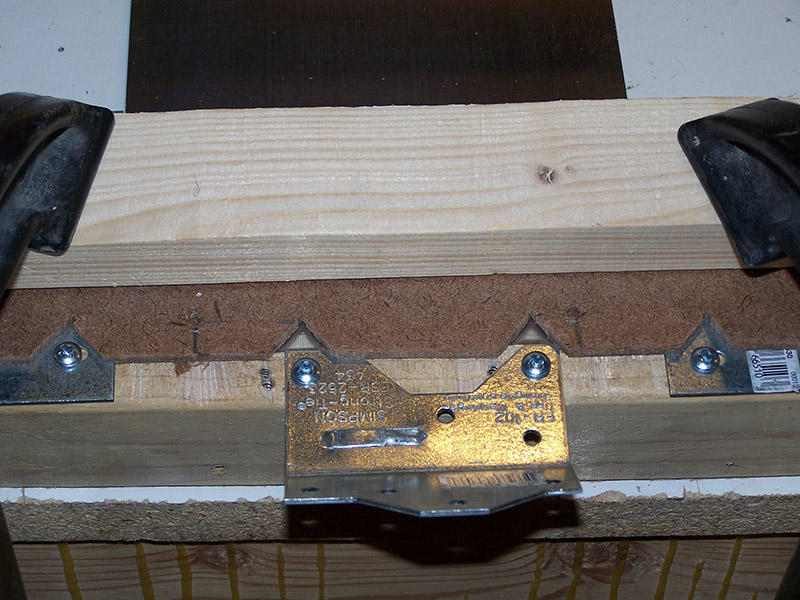
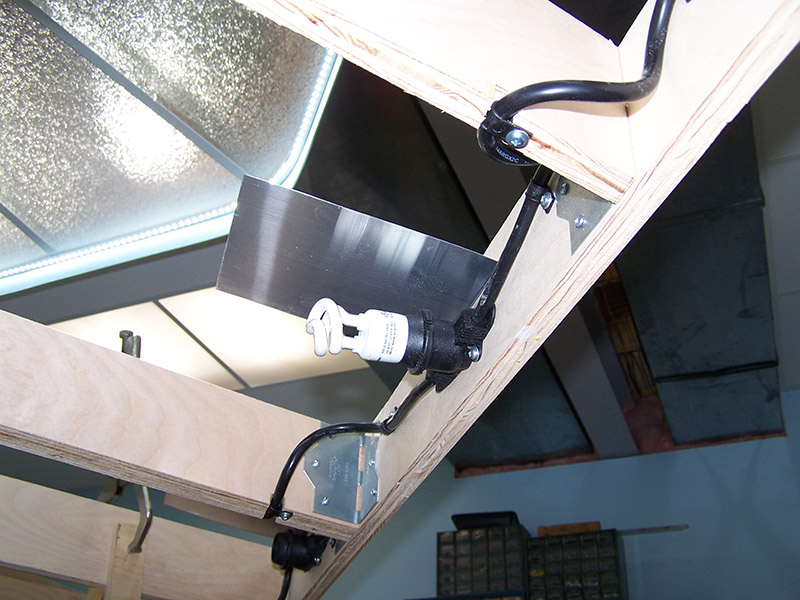 I turned to my trusty roof flashing material once again for reflectors. Pre-cut 5″ x 7″ aluminum flashing panels from Home Depot. Knowing the reflectors will likely be uninstalled/reinstalled during the course of sub-roadbed and wiring work I made them all the same so they are interchangeable. If I take down a bunch of reflectors to do under-bench work then I don’t have to remember which goes where. The obstacle was mounting hole standardization. For that I made a temporary jig. You know my love for cheap tools made on the fly. Here’s another one. My reflector drilling and bending jig.
I don’t want anything to extend above or below the 3-1/2″ benchwork. The Party Light sockets cannot be separated from their cable and I didn’t want to bore giant holes to pass the sockets through the cross members so here is my solution. I router cut a slot across the bottom of the cross members just large enough to fit the cable and a 3/8″ nylon cable clamp installed upside down. Think a router throws a lot of saw dust? Try holding one upside down! Holy crap, it was like working in a blizzard of saw dust. Thank goodness the cuts were short. Now, standing in the aisle looking down the railroad you can’t see a single wire. Mission accomplished.
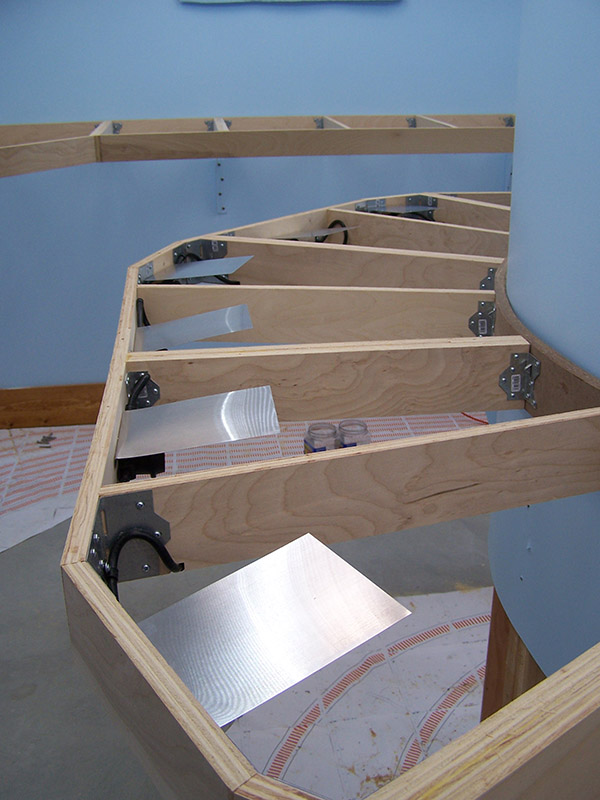
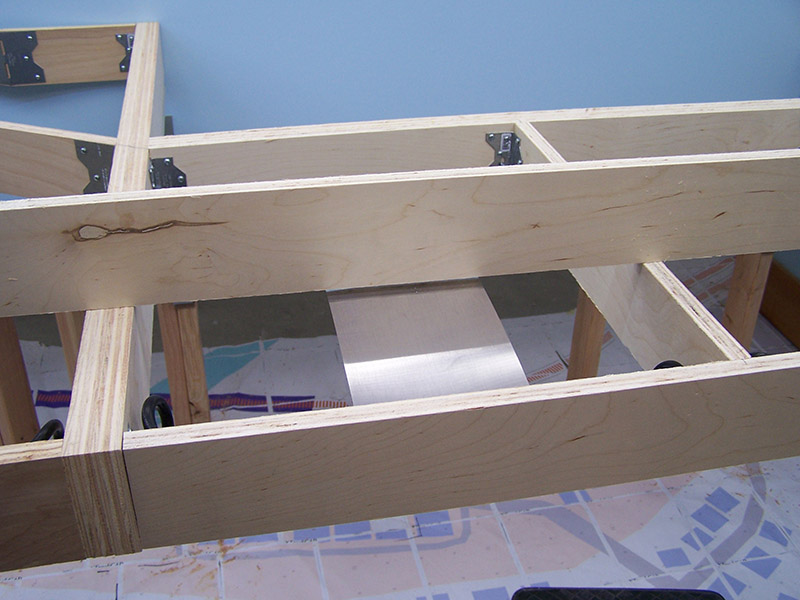
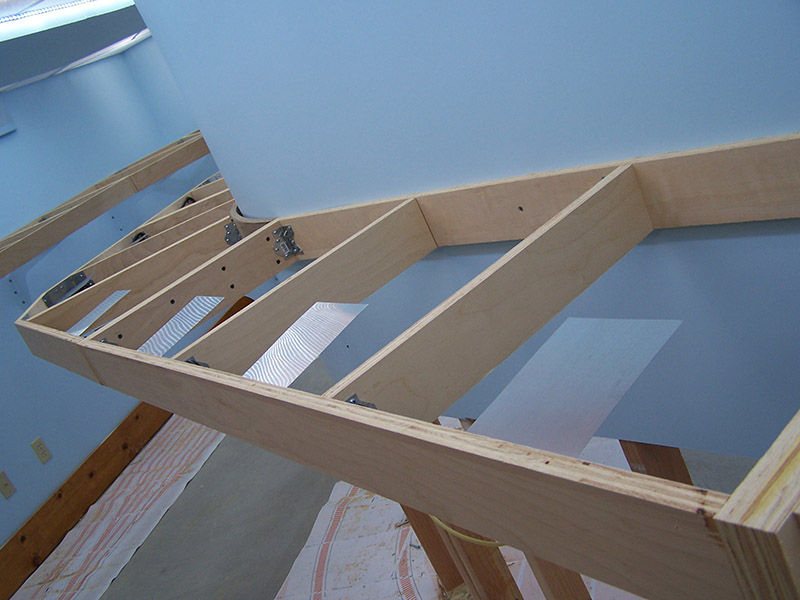
I continue making and mounting reflectors. 24 are in place with 48 more to go. After that comes mounting LED strips.
Light, light, and more light!


Alan, I just recently discovered your blog and have been enjoying following your progress. It is especially interesting because I live right up on the hill by Brittain Yard.
I am just beginning construction of my own layout. My question for you is, how is your power grid arranged for your layout? Did you do anything special with room wiring for power distribution, and are all your lights on one circuit?
The room I am putting my layout in shares circuits with the rest of the house but I want to add dedicated circuits just for the train room. I was thinking of putting two opposing walls on a circuit, with the outlets and lights on the opposing walls sharing the circuit. That way if a wall outlet or light on one wall causes a breaker to trip, I don’t lose everything in the room and I won’t lose other parts of the house. Not sure whether that is code or not and I’m also wondering if it’s overkill.
Start laying some track!!!
Jeff
Hi Jeff,
Glad to have you aboard. There is information about my 115v circuits here: https://lkorailroad.com/lighting-control/
In a nutshell, the room lighting is on the original basement lighting circuit (15A). The wall plugs are on the original basement plug circuit (15A). The LED power supplies are on two different 20A circuits, one pulled from the load center, the other from the upstairs jet tub circuit. The layout CFLs are on their own 20A circuit also pulled from the load center. The railroad power supplies will be run from the wall plug circuit. In total, the layout has three 20A circuits and one 15A circuit supplying power. I have a lot of lights and LEDs. Together they draw a good amount of current. Hope that helps you.
I found that post after I made mine, and it definitely helps. I too have a dedicated 20A just for the Jacuzzi tub and never thought about splicing off that. A dedicated 20A, the 20A tub splice, and an adjacent half bath with dedicated 20A should be more than enough, especially since my room is half the size of yours. Thanks!