Whew! That was a long spell between posts. I’ve been absorbed in preparation activities for winter. Started late last year. That didn’t end well. Not making the same mistake this year. The hay is up, fences are mended, maintenance has been performed on vehicles, and the to-do list of fix this fix that is complete. I think we are good to go. Let it snow. It’s the beginning of model railroad season!
I was going to title this post “Infinite Regression Meets Nike”. It is an accurate, although vague, description of my recent thought process concerning fascias. I decided to use a more descriptive title in case someone is actually trying to find useful information on this site. Why such an odd title you ask? While thinking about how to determine the fascia top edge contour (shape of the land) I found myself in a repetitive “this before that” regression that just kept going and going. I ultimately convinced myself that to shape the fascia contour exactly right I would have to first identify the size, shape, location, and elevation of every structure, road, sidewalk, river, stream, ditch, outcropping, culvert, and…. It was maddening. Now I enjoy planning as well as the next guy but seriously, plan every stinkin’ little detail just so I can cut some Masonite??? That’s where Nike comes in. Just Do It! Throwing caution to the wind I am just doing it. What’s the worst that can happen? Waste a little Masonite? I can live with that.
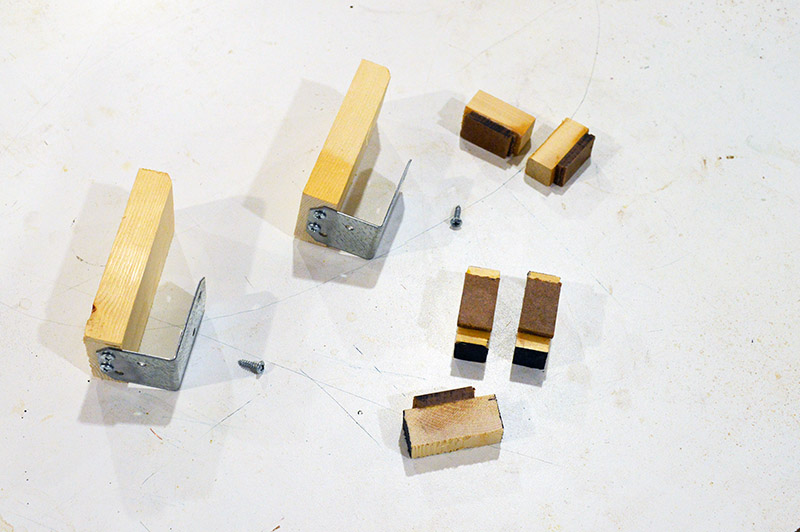
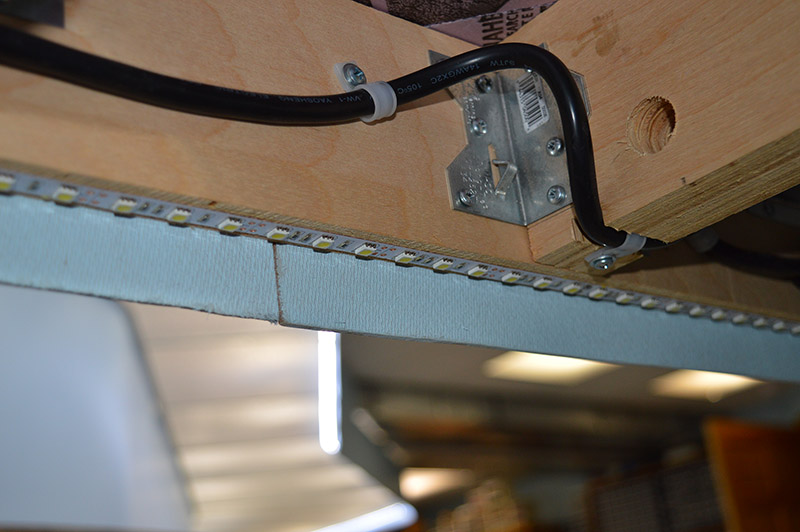
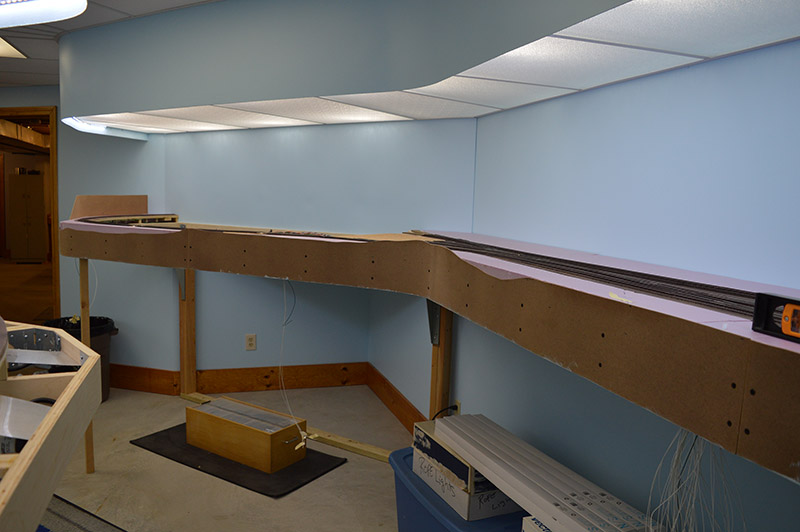
To get started I made some helping hands from nailing angles and wood scraps. These little gems temporarily fasten with a single screw and align the bottom edge of the hardboard 1″ below the benchwork. The 1″ apron provides a reflective surface for the lower deck LEDs to prevent light spillage into the aisle. Spacers permit quick and accurate positioning. There are two sets of spacers. One for benchwork without lower deck LEDs and the other for benchwork with LEDs – one inch and 13/16″. The non-LED spacers are colored black on the ends so I don’t accidentally get them mixed up.
There are three new sheets of hardboard waiting in the wings but before I rip the new sheets I want to use up the leftovers from the lighting valance build. They have been on the wood pile for several years just for this very purpose. Sadly, they are 12″ wide which means I can’t quite get two strips out of each except in areas where the ground contour is very low. I can see there will be a lot of waste. Thank goodness hardboard is inexpensive.
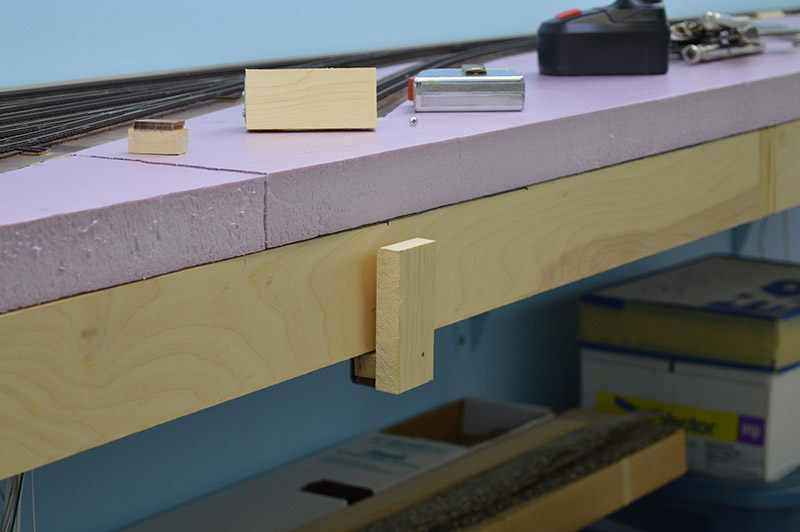
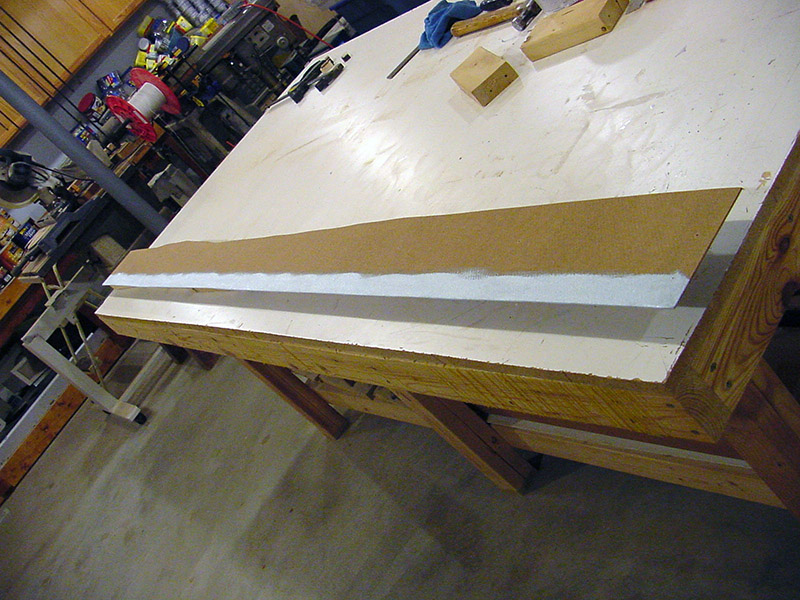
With board holders positioned I begin by clamping a blank panel in place.

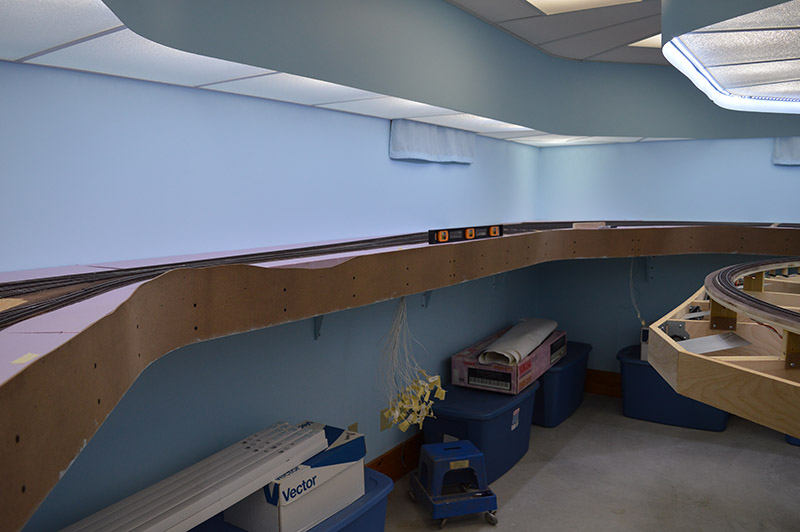
Marks at 4½” and 6½” from the fascia bottom edge are made as a visual of where the foam top and bottom lay. The bottom mark keeps me from drifting my cut down into the benchwork. The top mark represents zero elevation.

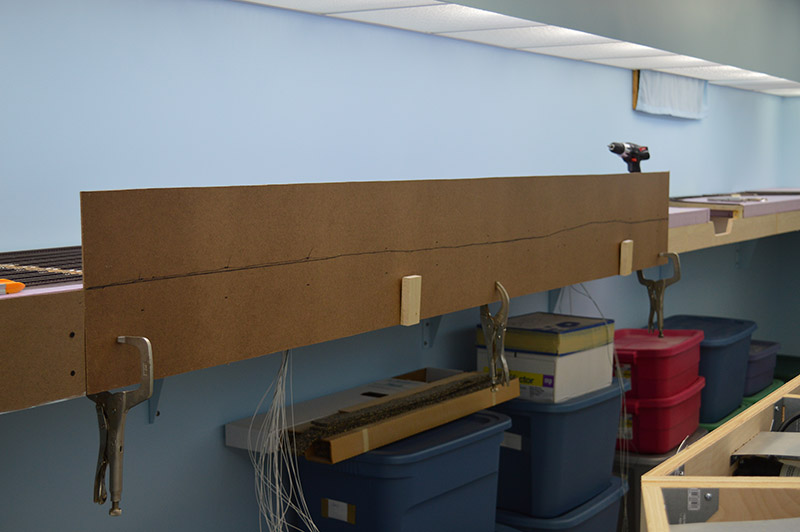
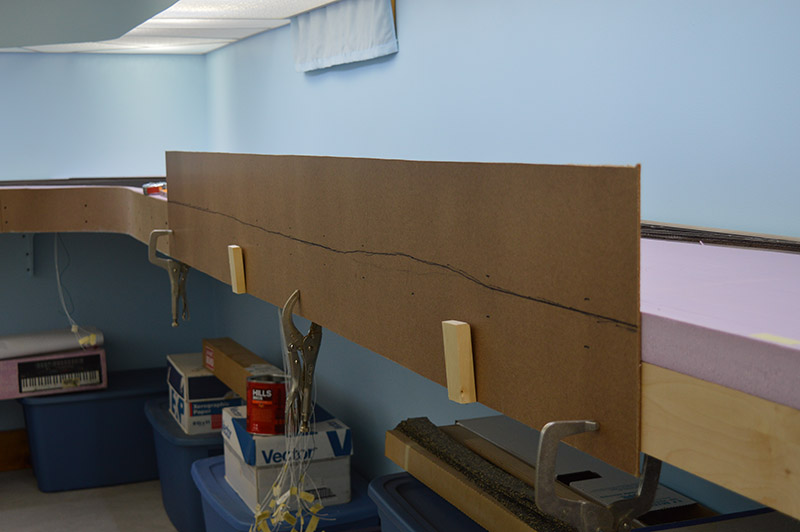
Next comes the Nike part where I “Just do it” with the contour line. I have a good idea where a lot of items will be located such as roads and major industries. I mark them first after which it becomes free form. I start by scribbling with a pencil. Once I get a contour I am happy with, I draw the cut line with a Sharpie. This allows me to view the contour from a distance to make sure I still like it.
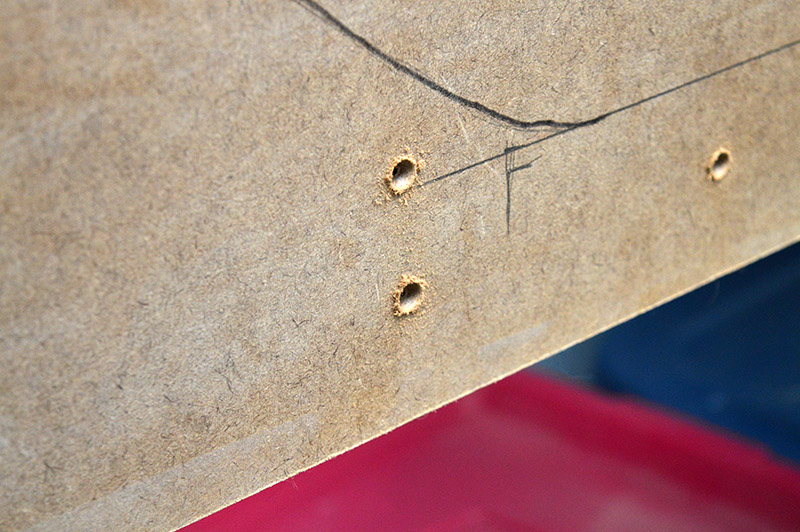
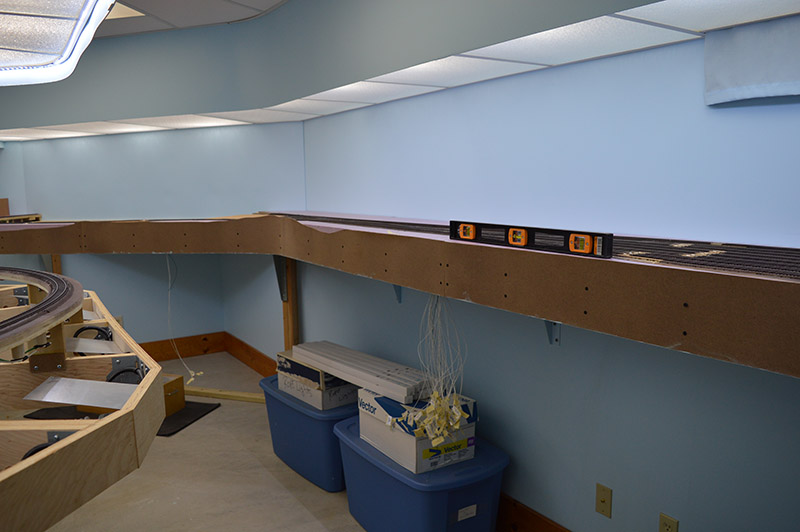
Locations for the attaching screws are marked and the sinks drilled while the blank is still clamped in place. The screws are located 1½” and 3¾” from the bottom edge except in areas of short fascia (as in example below). Three quarter inch long drywall screws work great because they don’t penetrate the backside of the benchwork. Too many wires back there to have screws poking through. Three quarter inch is not a very popular length drywall screw. The big box stores don’t have them. I eventually found a box of 6500 pieces online at a reasonable price. The spacing of the screws along the fascia is roughly every 12″ or so. The only places where it appears screw placement is critical are where a bend in the hardboard starts or ends and where rivers exit the layout. For the corners I drop a plumb bob down from the lighting fascia just so the curves line up. For the rivers I put the screws close together so the fascia is real tight against the benchwork where I will later pour epoxy water.
Back on the workbench the contour line is cut and the entire panel is given a quick sand with 120 grit on a DA sander. The edges are hand sanded. The face sanding gives the surface some tooth for the paint that will come later to adhere to. Lastly, I flip the panel over and paint a strip of Serene Sky blue along the edge that will hang below the benchwork. This same treatment was done on the lighting fascia above the layout.
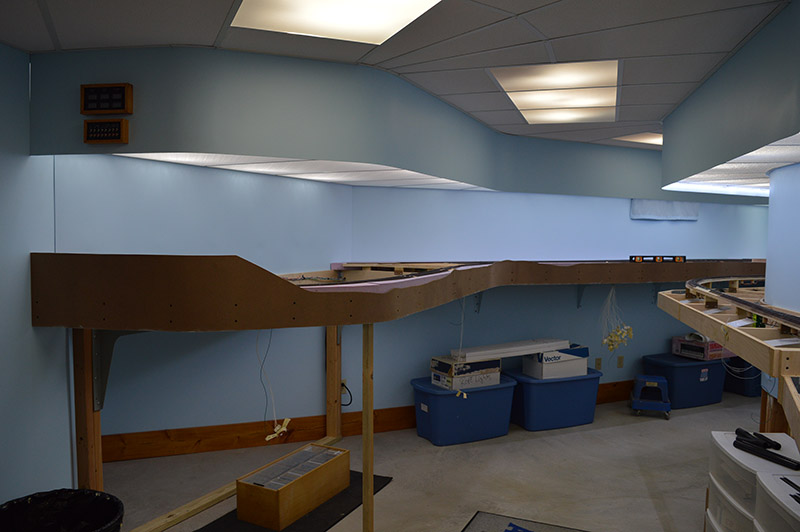
After overnight dry the panel is installed and I move on to the next one.

There you have it. Fascia contouring without a plan. Stay tuned as I make my way around the whole layout by “Just doing it!” 🙂


Alan, I had to chuckle at this one! I liked your tongue in cheek original title, otherwise known as the dreaded “analysis paralysis”. Yes, sometimes you just have to say WTF and just do it! Looks good.
Just curious – did you consider painting the inside fascia (that you painted sky blue…) silver – as more of a reflector? Looking forward to more frequent updates!
Clark
The backside of the fascia is sky blue to match the backside of the lighting valance. I am trying to make sure the lower deck lighting (color, intensity, etc.) is the same as the upper deck. The backside of the lighting valance is visible at some normal viewing angles. Painting it blue helped make it visually disappear.
The blue is actually helpful. 75% of the light is from 5000K CFLs which are deficient in blue output. That’s why the 6500K LED strings are there, to boost the amount of blue. The blue on the fascia reflector slightly adds to the amount of blue light on the layout.
Just great stuff Alan.Love to read your comments.As you know I am from Akron and love WV and been there…now retired and live in Czech republic building only small switching layout,based on Chessie system
Fascia’s add a whole new dimension to the layout. Being able to hide all the wiring and really defining the edge and aisles just brings everything that little closer to the end result.
Love the Nike analogy too, done that quite a few times on our layout… 👍🏻